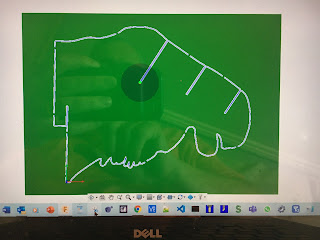
Brown Stuff????
Yes, working on The Brown Stuff in the workshop is against my religion. It's downright wrong to be soiling metalworking machines with the stuff. When I have to deal with it, it's usually under duress and related to updating or repairing the house and this distasteful activity happens where it's needed.
Moose?
We used to have a fun 3D moosehead that we acquired when we lived in Canada. It was made of laser cut MDF and slotted together before being hung on the wall as a hunting trophy.
Unfortunately one of the dogs ate some or all of some of the pieces before we reassembled and remounted the thing here in our UK house.
Luckily I photographed the pieces when I packed it for shipping, so have a record of what the missing bits look like.
The time has come to do something about that. You'd think this would be well within the capability of The Shiz, so why not have a go?
Recreating the pieces:
The approved method of recreating organic shapes like this in Fusion 360 is to import the photos and then convert into some form of vector outline. Once this is done, you can create a simple toolpath and off you go.
The recommended method seems to be to use Inkscape to convert a photograph (bitmap eg JPG) into an SVG which you can then import into Fusion. An SVG file is in a vector format, so that conversion is the key step. Stinkscape is free and open source (AFAIK), so I had a good at doing this. However, I struggled with some aspects:
- You need to use the contrast and pixel size settings to create a clean contour without causing loss of resolution of features and closing up of slots etc. I struggled with this and ended up creating an SVG with lots of unwanted artefacts (mainly pixel-like holes everywhere).
- If you don't start with a clean, simple SVG in Fusion, it struggles to process the sheer number of elements present. I found that having imported the file, Fusion would freeze up for 5-10 seconds if I so much as farted. I tried to clean up the SVG by deleting some of the noise but this was a hiding to nothing.
- Stinkscape itself would refuse to update the preview after making any changes to the contrast and pixel settings. This was a royal PITA, especially for a new user. So this was the final nail in its coffin.
- Import the photo directly as a "canvas" onto a sketch plane.
- Then trace the outline of the desired feature using the "spline" tool.
- Don't forget to scale the imported object either by "calibrating" it to a known dimension or scaling the sketch using a scale factor calculated from a physical measurement (on the actual part) and a measurement in Fusion of the object being defined.
- For features such as the slots, a 3-point rectangle ensures good parallelism of the sides both with themselves and other slots.
- I have 2.4mm router bits galore, so use these at max spindle speed (7000rpm) and a modest feedrate. I found 0.025mm per tooth worked well.
- Add tabs at strategic positions to support the workpiece as it is cut out. I struggled to manually place these on curved toolpaths but the "auto place" feature didn't have that problem.
- Sand off any burring with fine paper afterwards. Sounds like a bodge but in fact the burring was a lot cleaner than it looked and took very little elbow grease.
Setting up an MDF table
Toolpath ready to go:
Action
Actually a lot better than it looked
Part #2:
Antlers!
Nazca lines? Picasso?
Results:
But are they a decent reproduction?
A couple of small parts still to do but looking good so far.


