Monday 28 February 2022

Cleaning up and refitting the Z axis ballscrew assembly and way covers

Cleaning up:

This will be a bigger job than the X axis, not least because it's about 1m long and has a lot more of the treacly grease on it. I suspect it was also less well protected from swarf and coolant so may take more effort. Off we go....


The miracle of WD40, paper towel, pot scrubbers and toothbrushes:


Seems to be in reasonable shape visually, although I can't resolve 1um with my eyesight.


Again, the resolver nose is handy for driving the ballscrew when cleaning with brushes etc.


Barely legible in the photos but like the X axis, it's an HSK 28mm double ballscrew with 5TPI(?) pitch. As you can see, the grease has turned to tar in places.


Came up nicely after an hour or so of buggerage.


Let's prepare the machine to receive its ballscrew again. 


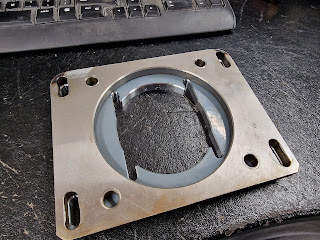
The thrust bearing housing bolts to the bed with 6 fixings, along with 2 taper pins. It looks a bit grotty but in fact it's mainly superficial discolouration.


The ballnut screws into this bracket under the saddle. 


...and here's the free end of the ballscrew


This is the thrust bearing end of the ballscrew assembly.


Refitting the Z axis ballscrew assembly:

Back in position


But before securing the ballnut to the saddle again, I'll grease it up...


...using the cordless drill again.

Telescopic way covers:

These are a bit grubby but clean up nicely using WD40 and a pot scrubber. This is the main cover that covers the bed between the headstock and the saddle.


That worked out nicely. And yes, I DID fit the fixings and taper pins to the thrust bearing end before fitting the covers.


Similarly, the X axis covers look the business again.


Sorted. Now to clean up and replace the pulley drive enclosures and drive(n) pulleys....

Clean up the toothed pulley. Somehow it ended up with grease in the tooth. Ho hum!


Saturday 26 February 2022

X axis bracket for LiChuan servo motor

The original DC brushed motors are F massive, so the mounting plates are too big for the LiChuan servos that will replace them. So I need to make up some new ones, starting with the X axis (aka cross slide). Here's the original plate inside the (cast iron) servo mount / belt housing:


And here's one of the ancient motors. Measures about 5" diameter and 8" long in old (US) units.

Here is the info for the replacement 90 series servo motors on the LiCHuan website


There's no clever dodge that will allow me to reuse the originals, so let's flash up Fusion and use up some of the 3/8" loominum plate I won when I finally and reluctantly scrapped the ATC. Here's the sketch that drives the model.


And here's the final model in the CAM environment, ready to generate g code.


Chop off a piece of 3/8" loominum plate and square it up in The Shiz.


Then off we go.


Roughed out with 10mm end mill using 2D adaptive


Then 2D adaptive with a 4mm end mill


Followed by 2D Contour with the 4mm end mill and a chamfer on the machined cavities.


Job done - ready for the arrival of the motors and pulleys.


Happy with that. Now let's clean up the Z axis (saddle) ballscrew assembly....

Cleaning up and reassembling the X axis


I previously determined that in order to remove the ballscrew / ballnut assembly for cleaning and inspection, I'd need to remove the front (thrust) bearing, as it's too long to clear the rea of the saddle .

So firstly I had to remove the 4 screws holding the cross slide bracket (ballnut yoke) to the ballnut. This was a PITA, as the only access to the bottom screws was through the gap between the ballnut and the saddle casting. Luckily it didn't fight me. Luckily because if I'd managed to mess up the socket on the screw, progress could have become rather tricky. PITA because the socket was full of brass swarf that had to be cleared out before I could get the hex key far enough in to break and drive the screw safely.

Naturally, the bearings didn't want to just fall off, so a pulley puller was needed. This is the same one that did sterling work on the pulleys.


Ready to come out?


Here it is finally. It's an NSK double ballnut and looks almost identical to the ones in The Shiz - perhaps not surprising, given that they are almost the same age.


The markings say 
NSK
W2802-142D-SPZ 
1NX-046

Careful measurement shows that this is a 5TPI thread rather than a 5mm pitch. Over 20 threads I'm seeing 101.6mm rather than 100mm. I suppose that's not surprising for a US machine and isn't really a problem, as I can set up the servos with whatever ratio I like.


Cleaned up nicely.


This is the thrust bearing (operator) end


And the drive (pulley) end. The little extension is for the encoder drive, although I  won't be trying to use them with my Acorn system. If there's any backlash in the belt system, I'll have to live with it.

Let's put it all back together again:


The encoder spindle extension is handy for working the grease into the ballscrew / ballnut.


All lubed up with grease (ballscrew) and way oil (slides)


Back together finally. 

Final assembly and test of the spindle nose adaptor - RESULT!!

After the recent distraction caused by the 3D scanner, resurrecting the 3D printer and buggering about with the throttle bodies for my Honda...