I'd naively thought the toolpath would then avoid clashing - but that would indeed be naive. It even shows up in the simulation (the tool goes red when a clash is found) but messing about with height settings etc doesn't help:
For now it's hardly an issue as this part of the machining is done and dusted but I'd like to know how to resolve it for next time. Luckily the resulting gouge didn't destroy the tool or ruin the part on this occasion.
Managed to resume the program where I aborted it last night. I figured out that the spiral ramp into the taper bore started at line N8890. To prevent recutting vast quantities of swarf in the hole, I reduced the feedrate temporarily to 50% and blasted it out with an aerosol air duster. Really, I should use compressed air if I can't be arsed to clean out the sump and use proper coolant but that air duster can has been sitting idle (gathering dust perhaps?) for a long time and needs to be put to work.
That was a bit of a slow operation, not least when you forget to turn the feedrate back up after the taper bore. Still, no drama and nothing broken. And as an added bonus, the rubber pants remain unsoiled.
I told it to make manual tool changes (it's made as a tick box setting for each tool in the tool library) and sure enough, after the first operation (3D adaptive), it tried to return to Z0 or thereabouts with that in mind - but then complained about not being able to get there. I must figure out what the issue is at some point but for now I should probably be aiming to post process and then run each operation one at a time. To be honest, that would be good enough, given that I've barely managed half an operation at once so far.
So that's the first 3D Adaptive operation done.
Next is finish machining the vertical surfaces I just roughed out, using a 3/8" carbide end mill and another 3D Adaptive toolpath. That should be a lot faster due to the higher speeds and lighter cuts. And it's a pretty short operation. I hope I don't ping this tool, as I only have one of them and nothing similar to substitute. It's possibly tempting fate to look ahead more than a couple of steps but if the tool survives this, it will then be asked to machine the counterbores for the cap heads that form The Startled Man's eyes.
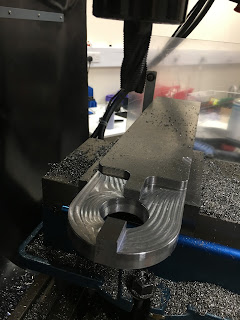
It's starting to look like a tool setter now. There is still some material left, to be removed in the finish machining stage, so the toolholders will not fit over the dogs yet. But you can see the general idea.


No comments:
Post a Comment