Did some last minute sanity checking and a couple of tight-buttocked run-ups, aborted at the last second. Finally I bit my fist, donned my best rubber underwear and went for it.
These are the tool table settings:
Started out OK but with a full 25mm depth of cut, 8mm optimal load, 0.08mm feed per tooth and 800rpm, it didn't sound too happy when it got stuck in. This may be partly due to the long stickout of the quill and partly due to having the machine vise mounted on top of spacers - both a result of needing to accommodate long drill/chuck and 3D probe. That's one downside of having a turret mill rather than a bed mill.
The difference in material removal rate (MRR) between this HSS cutter and a carbide cutter is quite marked. 800rpm looks and sounds rather tame compared to the indexable tools I was using on aluminium. But still, clearly the machine isn't man enough to play with these tools properly.
So I paused and then stopped the program execution before carefully jogging the tool clear of the work. At least nothing got broken. I think the YG-1 HSS rougher is about £15-20, so I should be grateful.
So I reduced the optimal load from 8mm (40%) to 5mm (25%) and the maximum stepdown from 27mm to 9mm. This means it will have to make more passes and clear the material in several layers. Call me a girl but I suppose I ought to "creep up" on the machine's capabilities rather than seeing if it will drive the tool at 100% of the databook limit.
This time it went well. I don't have any coolant yet (still to clean out the sump), so it was all dry. The roughing cutter generates lots of small swarf due to its "corn cob" serrated teeth. However, once it started spiralling down into the tapered bore, the swarf became long curly ribbons. I may also have overdone the ramp feedrate (233mm/min, almost the same as the normal cutting feedrate of 250mm/min). Anyway, the bore filled up rapidly with curly swarf and I could hear it starting to recut, which isn't A Good Thing, so I made my excuses and left before I broke the tool or made mud.
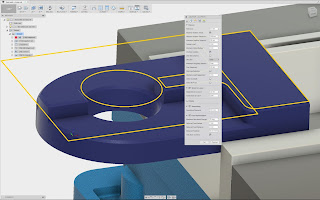
It doesn't seem easy to figure out from the Fusion 360 CAM just where I had aborted the program but as it was part way into the first spiral ramp, it shouldn't be difficult to identify where to restart the program - with reduced feedrate perhaps. Perhaps I've missed something in Fusion but never mind - there is a sort of beta version of a backplotter called NC Viewer written by an Autodesk intern that shows you the g code in a panel alongside a graphical display of the toolpath in another panel.
It seems that the spiral plunge begins at around line N8800, so if I can figure out how to restart the program at a given line number, I can restart the machining just before the point I wimped out. Then I can pause the program and clear the swarf periodically as it clears the tapered hole. That's probably better than regenerating the g-code with girly feed rates.
Sooooo - job sort of part way done. Doesn't look too bad:
- No broken tools.
- No (severe) gouges.
- The rougher insisted on roughing out the chamfered edges(!!). I didn't pick up on that but apart from wasted time, no harm done. It did a bit of a lead-in and lead-out (visible to the right of the first pic, if you look closely), not realising that the stock actually extends out past the work - but we got away with it this time....
- Some of the moves were slow, presumably due to the "stay down" setting for small moves.


No comments:
Post a Comment