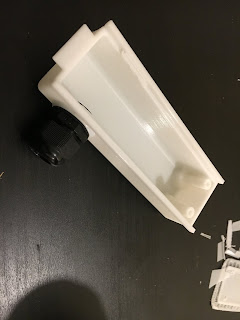
This in grey, although I haven't got round to ordering any grey or black yet:
So this is the first part off the machine. I used the coarsest settings ie 0.35mm layer thickness and "fast" setting. It would almost have been good enough - apart from the threads which didn't resemble a metric profile by quite a way.
It was a complete arsehole to remove from the table and the surface finish was crap. I was expecting a "raft" under the part, to allow easier separation. Once removed from the table, I was unable to clean up the edges. Bloody annoying. As mentioned, the threads were crap, so the cable gland wasn't going in there and the tab for the cable tie had threads hanging off it.
This is just shite. Not impressed.
Anyway, the reason for the crap finish and sticking to the table became clear when I went to rerun the part last night. That fat useless bloke had managed to get in to the settings screen and tick the boxes that removed the "raft" and supports. That explained a few things.....
So I ran the part again, this time with raft and supports and with "normal" speed and 0.1mm layer thickness. It started off OK - here's the raft and the first few layers:
It took 9.5 hours to complete ie it ran over night. In the morning we had this:
Here we go. Got the spatula under one corner and off we went. This time it contained recognisable / usable features....
The "raft" peels off easily enough and although I don't know how they do it, the remaining surface is pretty good. I wonder how they manage to lay the part on top of the raft without it fusing? Must be something to do with the speed eg they manage to get it laid down and chilled off before it can fuse with the raft.
The various supports came away easily. And the acid test - as you can see, the cable gland screwed right in once I'd cleaned out the remains of the supports:
Job's a good 'un.


No comments:
Post a Comment