It's all very well dreaming up all sorts of things to get started on. But first, how about finishing what you started? Before all this virus stuff hit us, I was part way through making the parts for my latest (final?) version of the the Bridgeport CNC conversion Z axis assembly. Thought it might be a good idea to finish this off before gadflying off onto something else.
Bearing retainer plate - what up?
It's what retains the ballscrew thrust bearing. A lozenge shaped piece of steel with 3 holes in it - one to clear the ballscrew and 2 for countersink machine screws. I like to keep things reasonably simple.

Best way to model this part is to create a projected sketch within the housing assembly and extrude it etc. That way it's linked to the housing in case I should ever decide to change the housing (it is parametric after all). Here it is. I created a 0.25mm offset around the circumference to ensure a degree of clearance so that it will stand a chance of fitting into the cavity. The precise location isn't entirely critical.

I also need to create a stock model for the piece of steel I found. Seems to be bright (cold) drawn steel of around 1/4" nominal thickness. Measures 6.35mm, so pretty close to nominal, then.

Here's the plate buried inside the stock:

It's easy to pick up the X, Y & Z positions at the corner shown using the Renishaw probe.

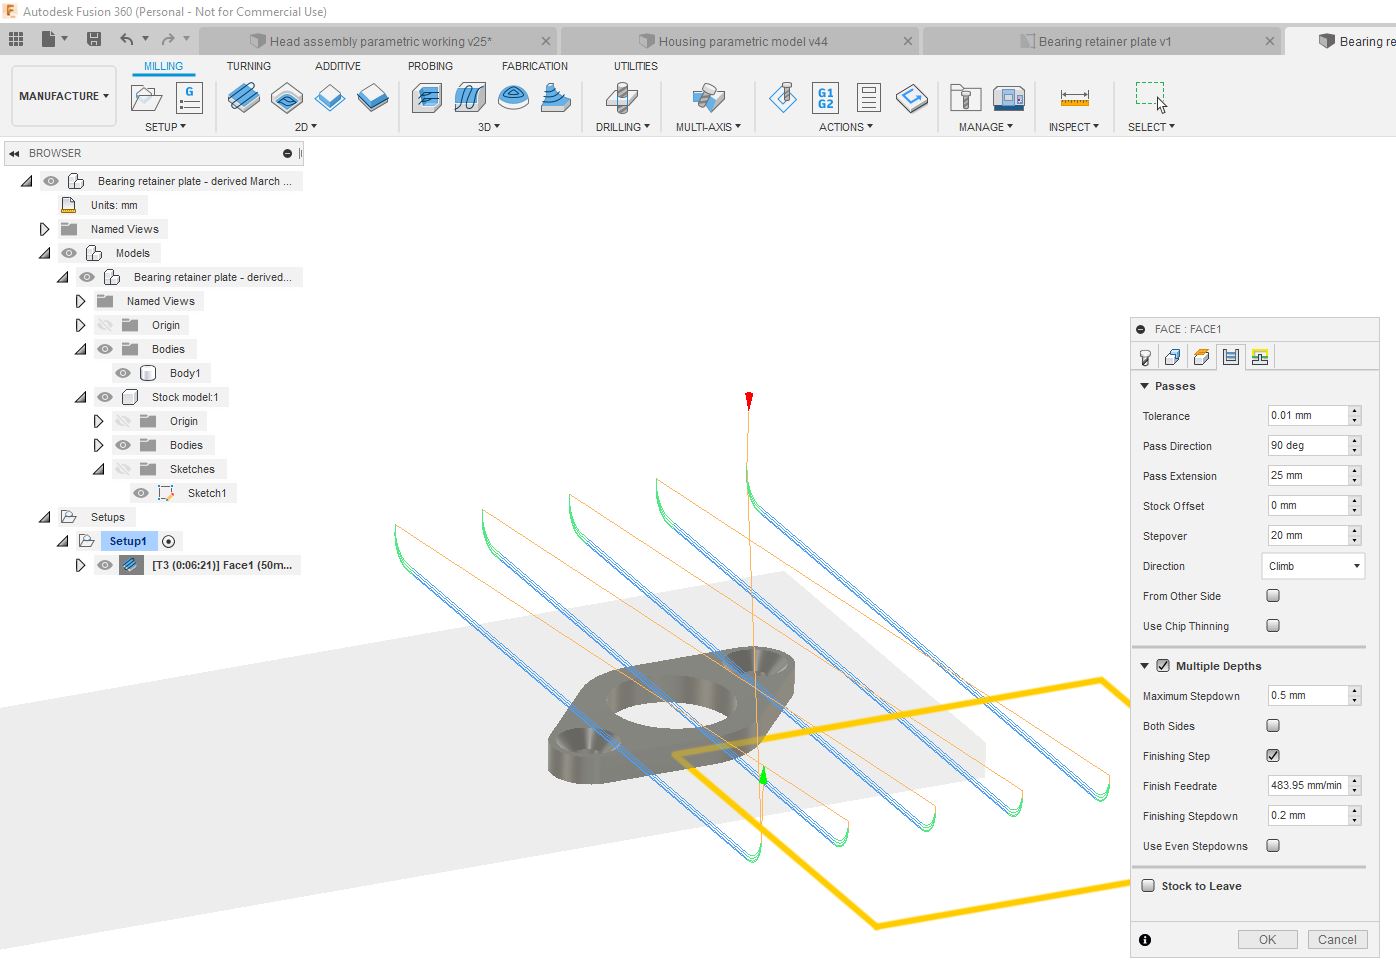
This is the CAM setup, showing the initial facing toolpath. Obviously I don't want to face off the entire length of the stock, so I'm cutting across the width of the stock and using climb mill only, to give a consistent surface finish. Furthermore, I thought it best to use only modest stepdowns this time, to avoid chatter and nasty patterns on the surface, as it's only 5mm thick after facing.
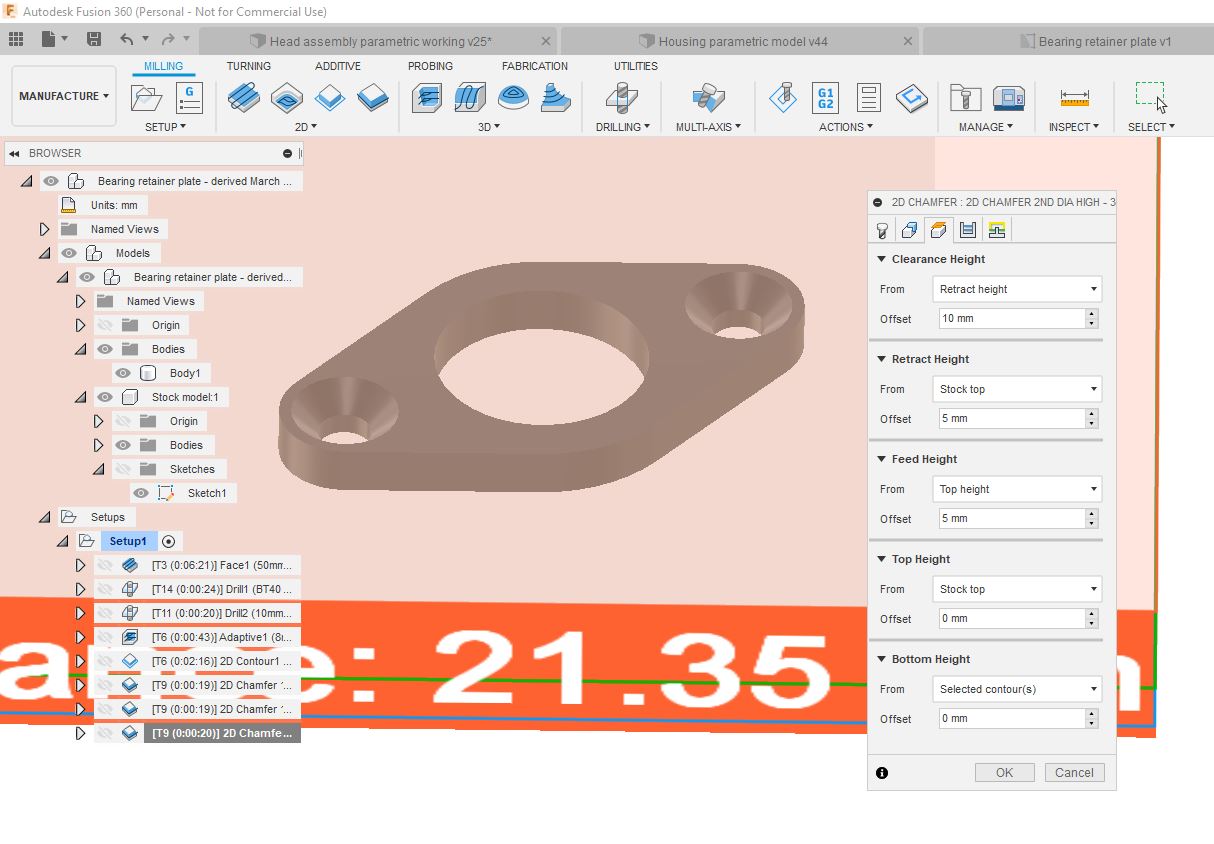
This was my first pass at the toolpaths. Looks ok to me, although the chamfer cutter is only 6mm diameter and the OD of the chamfer is 11mm, so there is only a tiny margin. It also means that the centre of the cutter has almost no surface speed. Not ideal. This sounds like an ideal opportunity to spend an hour or so buggering about with the 2D Chamfer settings....

Chamfering - again!
Hmm. Rather than try to machine the (large) chamfer in one pass, better perhaps to chamfer to a diameter of ~8mm, then dive down to the final depth and repeat the 8mm chamfer (forming a sort of counterbore), then finally chamfer the 11mm. The 3 operations should (ideally) result in the same outcome as if I'd used a single, large chamfer mill, but achieved using a smaller one in 3 moves. This is partly due to me being to lazy to swap over to the 3/4" chamfer mill, partly due it being not as good as the 6mm chamfer mills and partly due to me wanting to figure out the chamfer settings.

The way to prevent a full depth chamfer is to limit the bottom depth - to 1.5mm here. So it only creates a shallow chamfer.

Then repeat the exact same operation without the 1.5mm vertical offset. This results in a narrow bore with a countersink at the base:

Then finally, go full diameter at the full depth - this takes it out to the final 11mm diameter.
Here's the combined operation. The 3 blue traces show the paths of the tip of the tool. The first operation is the small circle at the top, then the small circle at the bottom, then finally the large circle.

And the bottom line is that it works. You can't tell that it wasn't done in one pass.
Machining:
Anyway, action talks, bullshit walks. So here we go:

Turned out good.

Bandsawed the tabs and belt sanded them down. Happy with that.

And above all, the bugger actually fits, which is the bottom line.

The Stupid Fat Bloke at large - again
And here's the one that got away. This is an 8mm carbide tool I used for some "experimental" feeds and speeds last time I cut some steel. I recall being pretty impressed that it had (almost) survived the experience, although closer inspection showed a couple of the teeth were chipped. No matter. This was running at the full fat 6000rpm, with 0.033mm/tooth, which translates to 800mm/min feedrate. Obviously this was dry too.
I just reused the tool - settings and all. It made a pretty impressive (heroic) job of the central bore which I'd predrilled, then set into the 2D Contour. I like tools that glow yellow hot but it clearly wasn't going to end well, so I stopped the operation and swapped tools before the workpiece got damaged. The bugger is that I thought I was videoing it - but it turns out The Stupid Fat Bloke had taken over video duties and had some how fucked it up.
All I have to show for the excitement is the (uncoated) tool with bits of steel welded to it. It survived largely intact but will be put out to grass now.

Let's assemble what I've created so far. I should have enough parts to get it to the point where it actually operates


No comments:
Post a Comment