What's the deal, fatty?
Ages ago (about 5 years ago), I acquired a Cetus3D Mk II that I used to print some parts for my Bridgeport conversion, namely a junction box for the DMM Tech servo motors ....

....and a box to house the differential line driver PCBA I made, to enable me to replace the rather ropey cables and rather non-industrial (9 pin D-sub!) in-line connectors that were supplied by DMM Tech with pukka drag cables.
The original cables included a line driver in a small PCB wedged inside the D-sub connector housing at the controller end of the cable, to complement the line driver that is housed in the back of the servo motor's encoder housing - so replacing the cables required me to source or make a slightly more workmanlike line driver. i couldn't find anything sensible off the shelf, so came up with this one:

This 3D printer came with proprietary software from Tiertime for the slicing and machine control functions (and even an app, although only available in iOS). It worked pretty well, allowing wireless control of the machine and a reasonable user interface.
For some reason (although nobody knows why), I subsequently bought an "upgrade"(?) kit from another supplier called TinyfabXYZ comprising a replacement CPU board, some actual limit (micro)switches and an LCD display with thumbwheel input. The notion was that this would give me some additional functionality, less reliance on the proprietary software, proper limit switches (although the "stall" method worked fine) and local control of the machine from the (new) front panel.
To be fair on myself, the Tiertime slicer / control app is very limited in terms of the control you have over the printing settings compared with the likes of Cura, whereas the Tinyfab program runs g code and allows you to generate the code from within an external app such as Fusion 360.
Let's finally get round to installing this Tinyfab stuff and see what it's all about. Here's the standard machine, reassembled:

Cover removed:

And these are the various parts required to fit the microswitches. I printed those before putting the unit into storage 4-5 years ago.

Let's fit the microswitches. Even if I decide the Tinyfab stuff is no improvement on the original system, these can be retained for use with the Cetus controller. I'd prefer a proper switch to the default arrangement which drives the axes into their hard stop and detects the motors stalling - this scheme works well enough but isn't very elegant.
X axis:


Y axis


The switches need a bit of tweaking to make a more dependable contact with the end stops:

That's better:

They plug in to the original headers, replacing the "stall" signals from the stepper driver modules.

Need to move the power and initialisation switches and status LED across to the new cover:

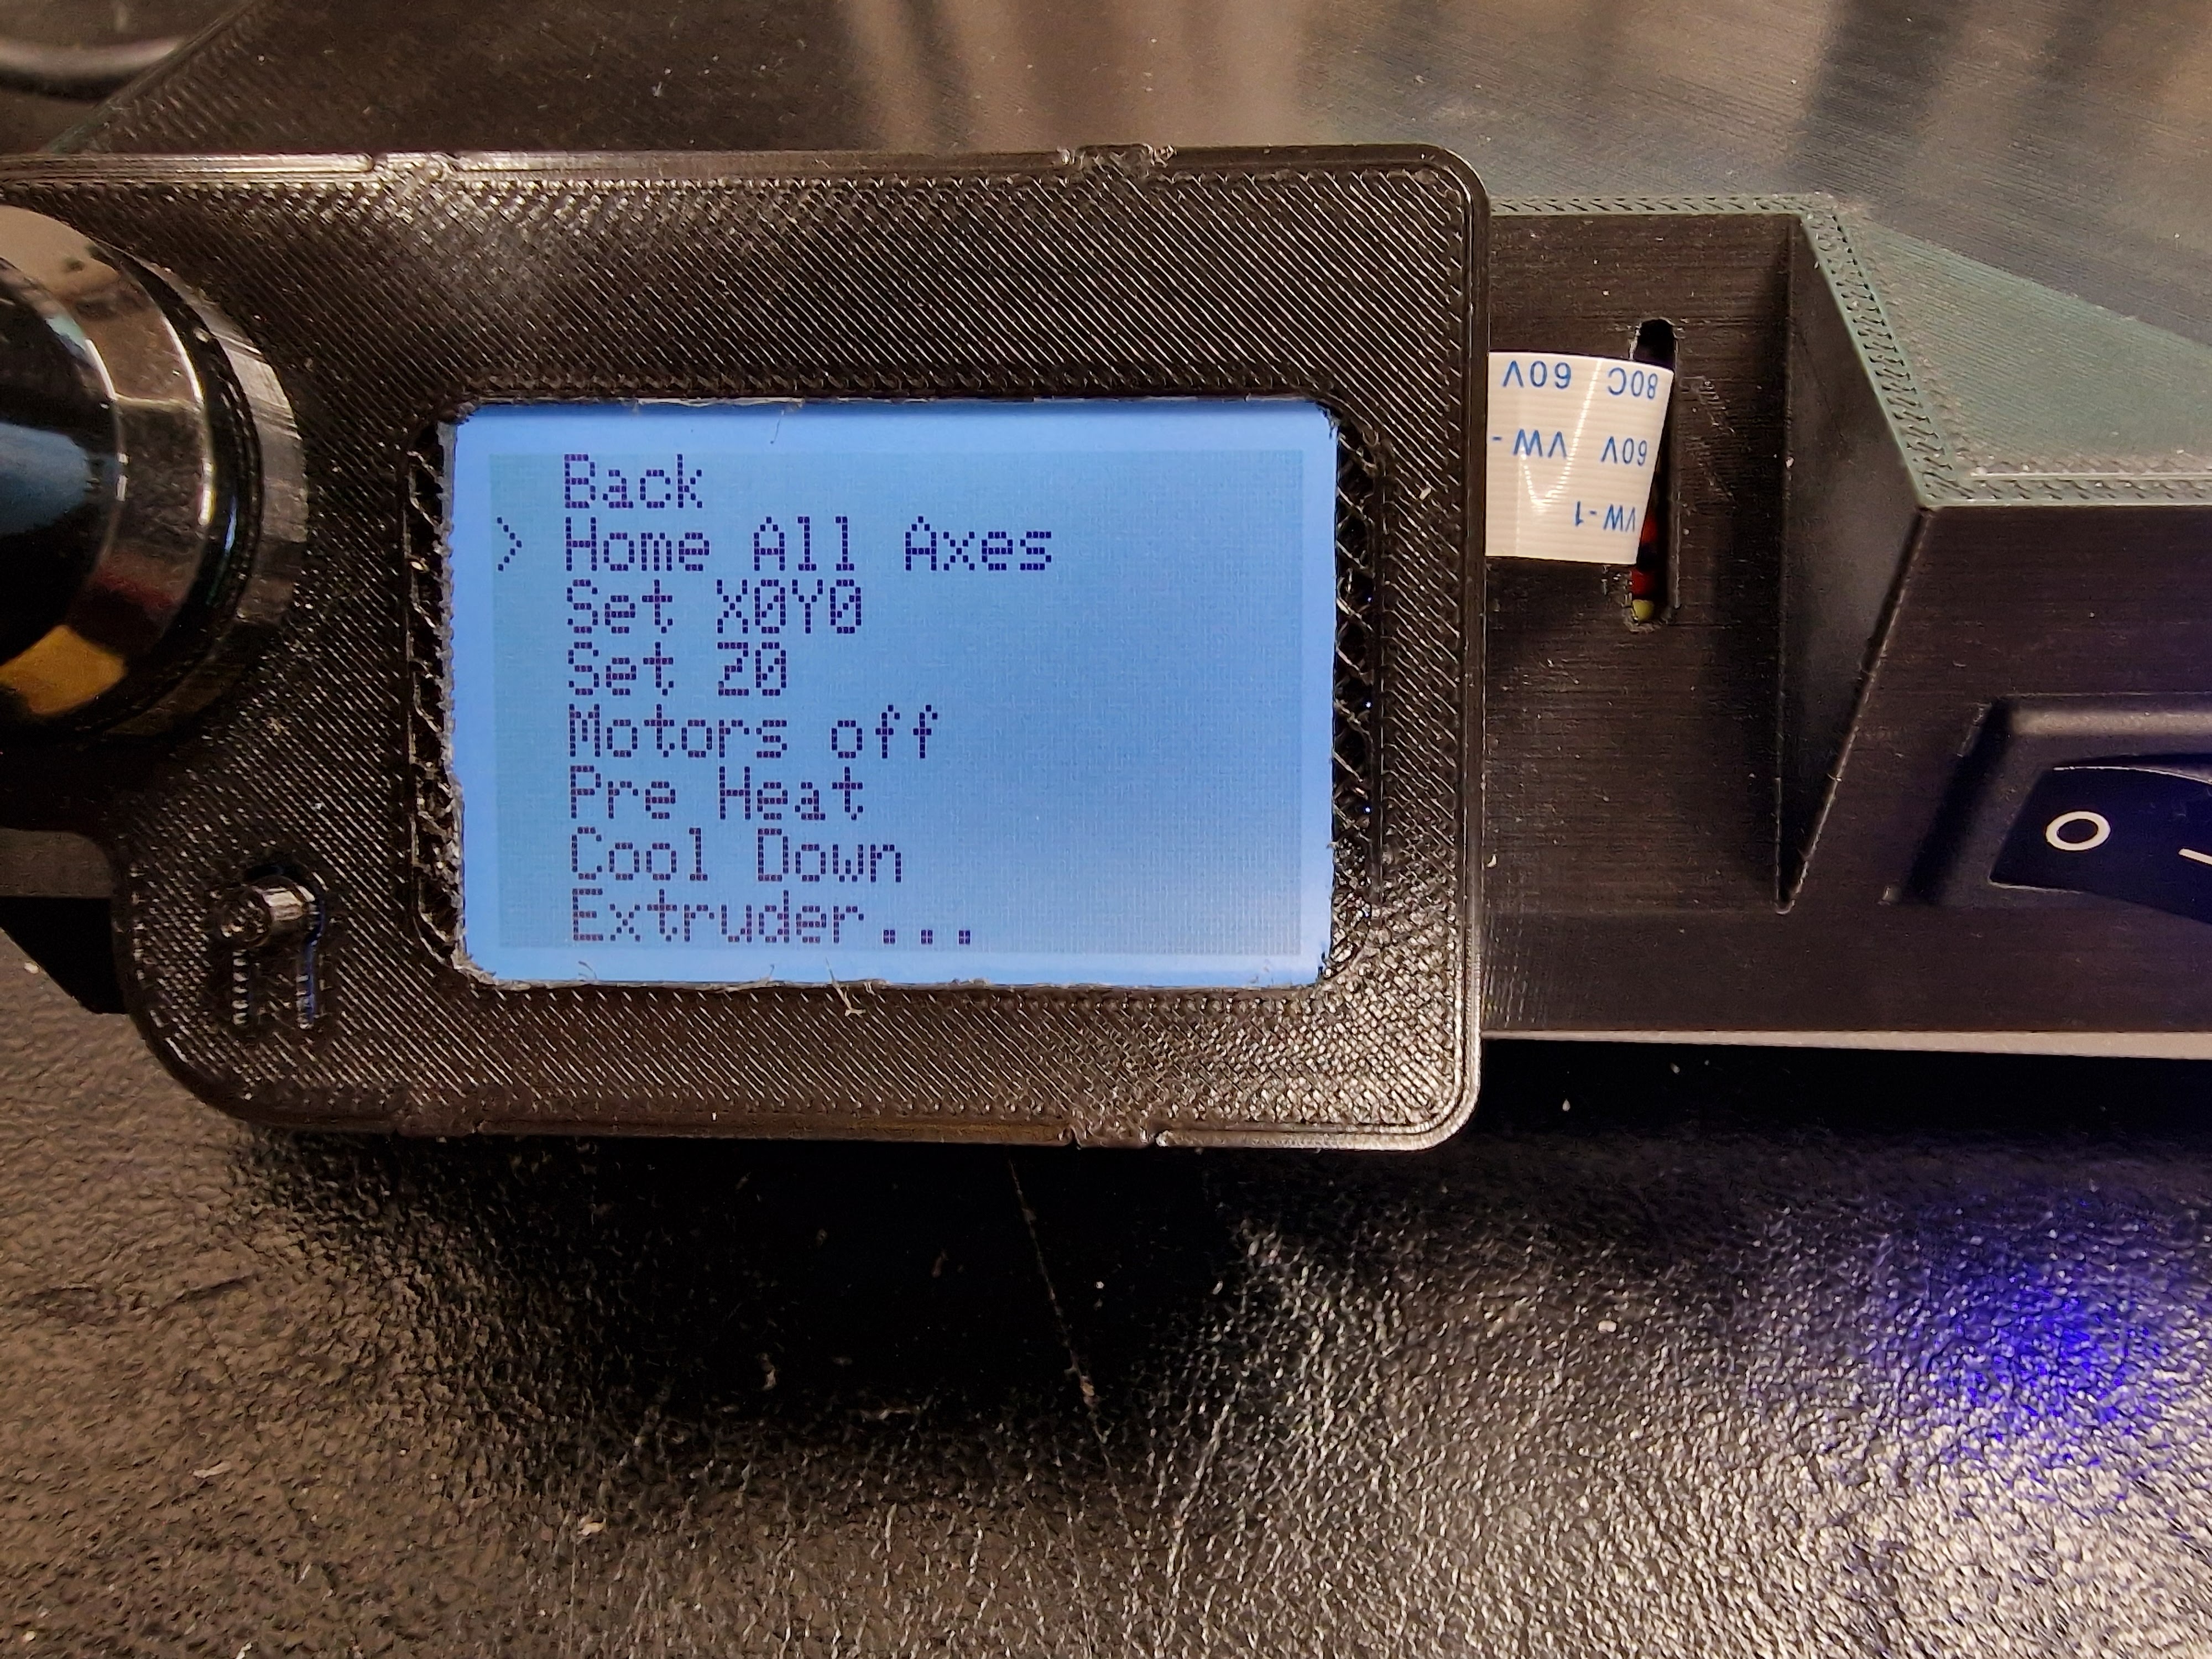
The new LCD display connects up to the replacement CPU board.

Seems to work, once you've put the config file on the correct SD card. There is a SD card slot on the display as well as one on the main PCBA. The update "instructions" such as they are don't tell you which one they mean - it's the main board one, which programs the main CPU, not the one on the display unit, which is intended for loading g code if you don't connect via wifi.
Lid back on:

Does it work?
Well yes, it comes to life once again, this time with a different brain:


Well, that didn't go well. Setting the Z height is a PITA - it really needs a proximity switch but for now that would have to wait. I also struggled to figure out how to set up the G54 coordinates ie where Z0 is, where X0Y0 is etc, with the result that when I tried to run a job, it tried to exceed the axis limits. The documentation is "limited" to say the least, so I'd need to experiment (fuck about) with the machine to figure it out. This isn't what I want to spend my time doing, TBH.
Before getting too carried away with the Tinyfab stuff, let's revert to the Cetus setup and check it still runs properly. Having installed the switches, config and firmware, it's a reasonably quick and easy process to swap between the two setups.
Reverting back to the Cetus.
This is one of the "primitive" test pieces selected from the main menu, printed twice. Looks pretty good. I used the fast / coarse settings to save time.


Not sure where the part starts and the raft finishes?

A closer look at the slicer, to get a clue:


Aha. Both steps need to be jettisoned:

Pretty good dimensional control in X and Y:

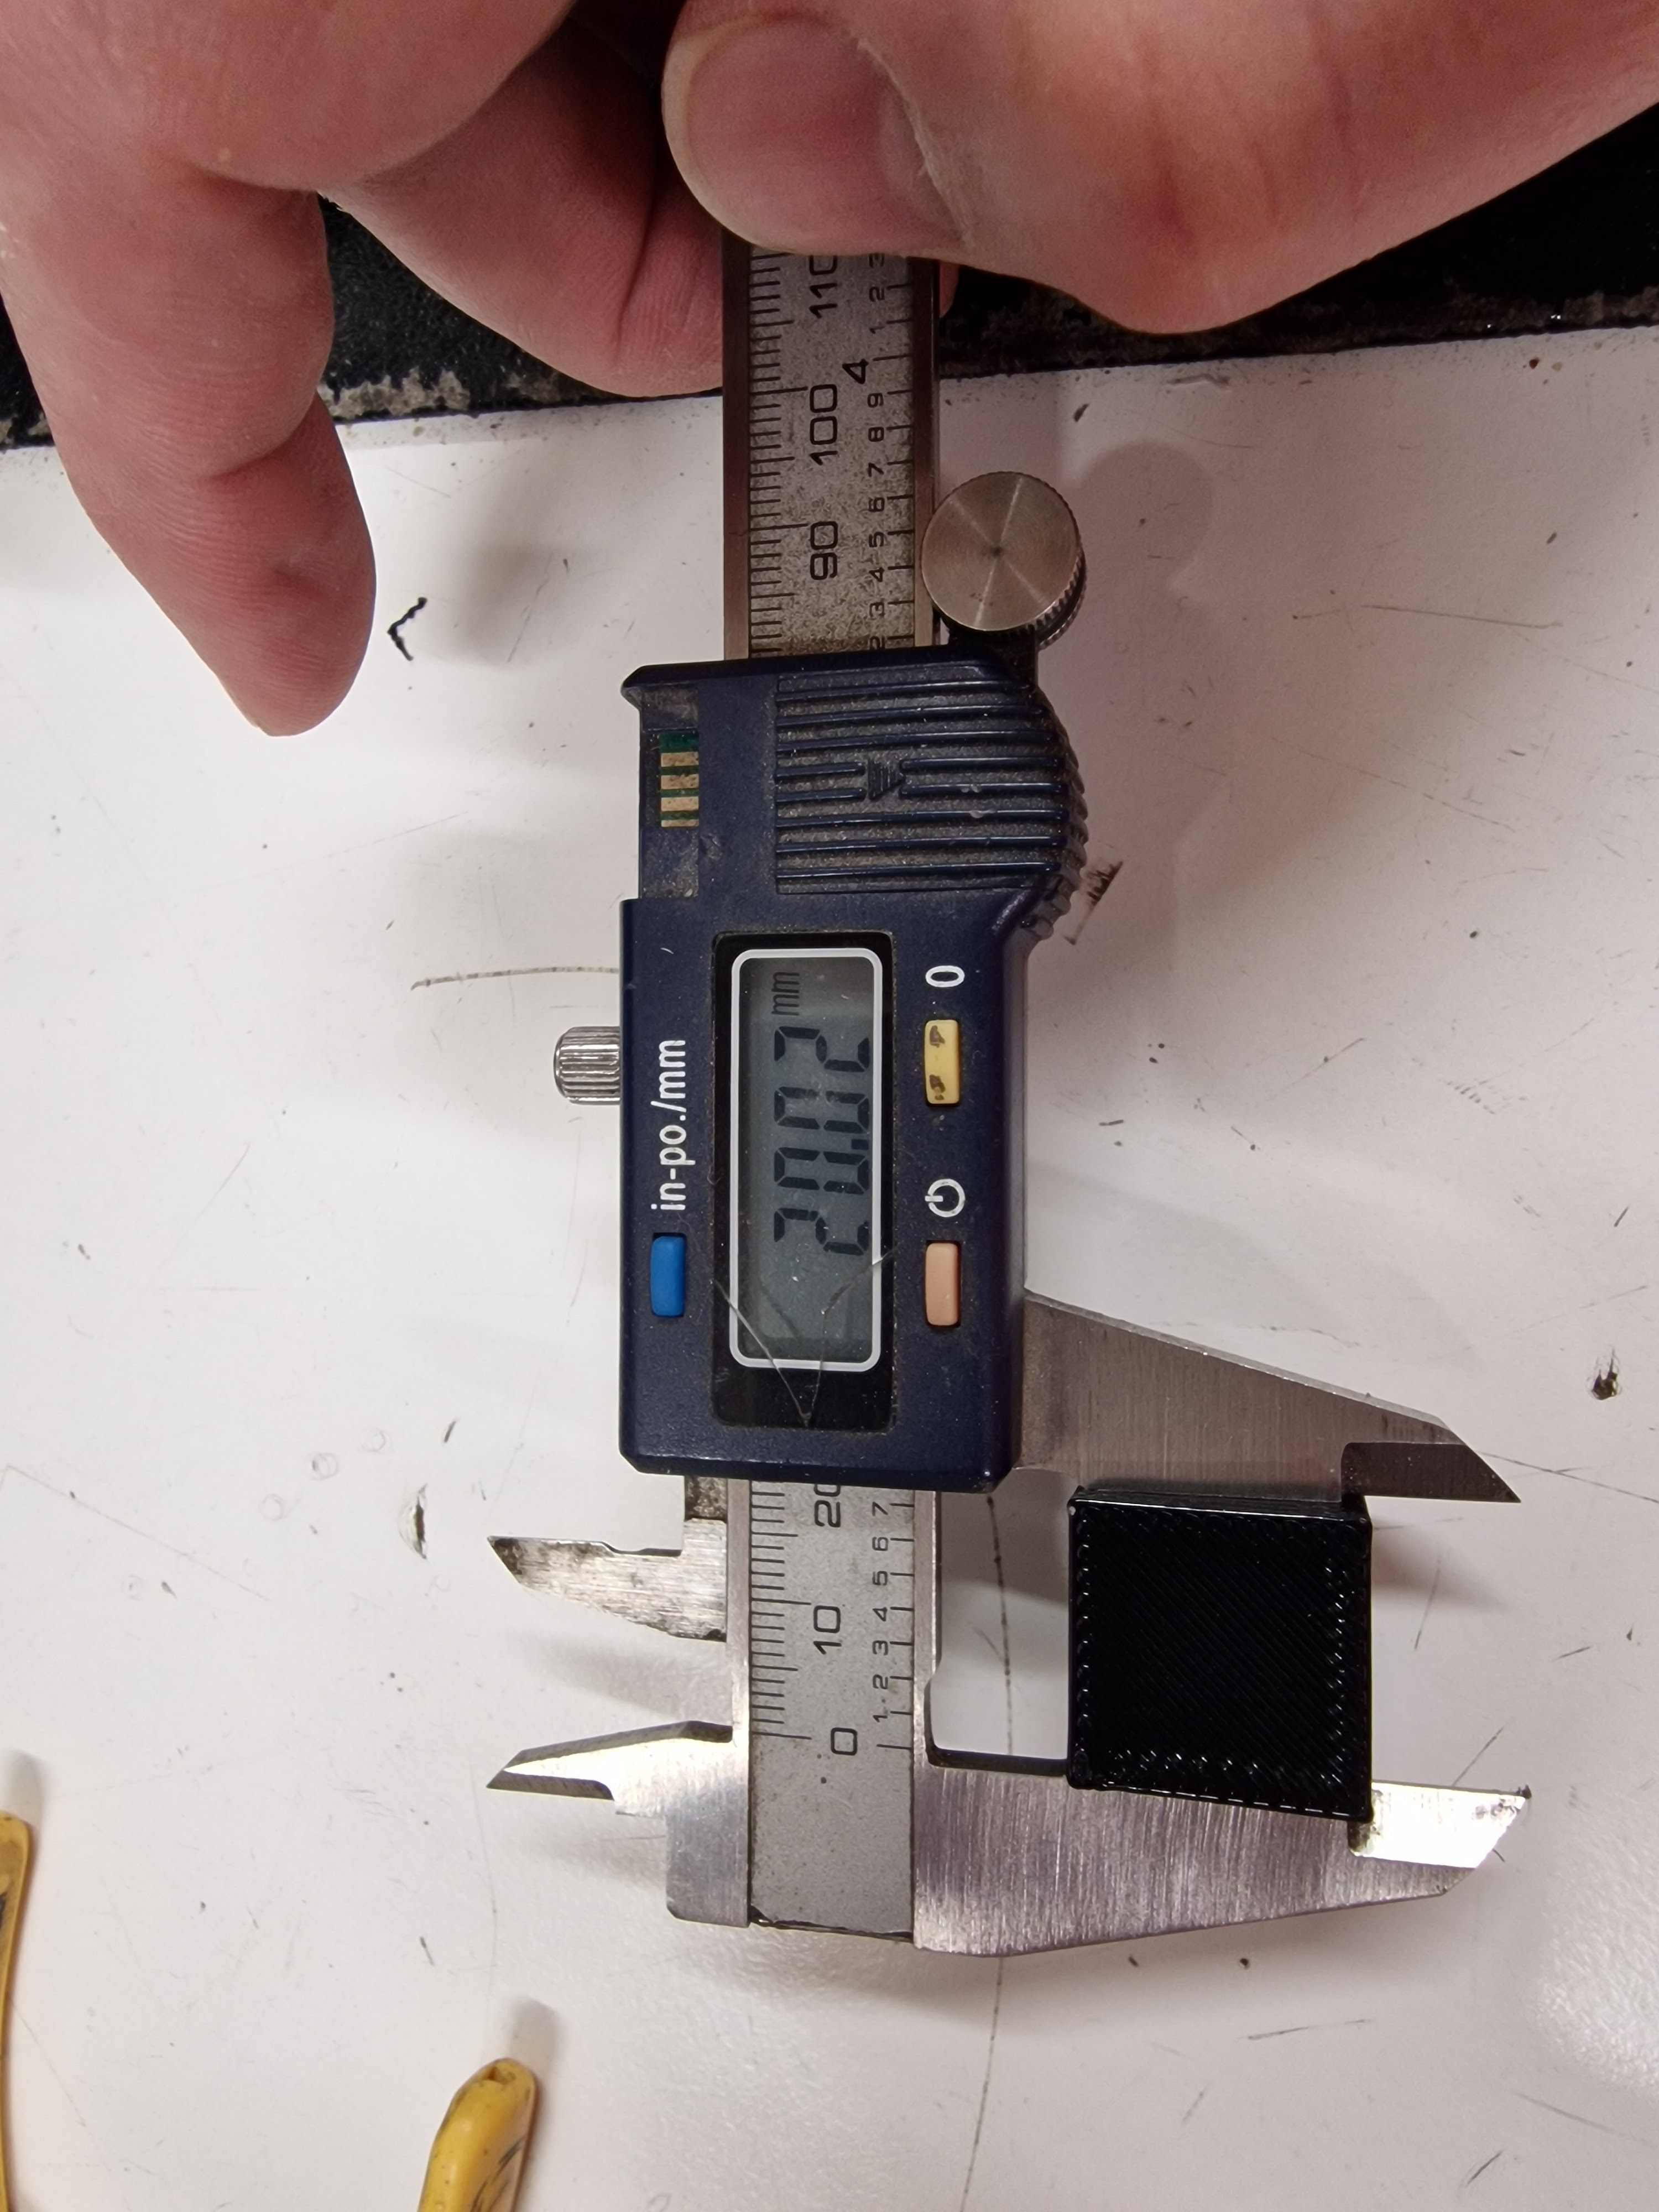

And also Z, once I'd figured out where the true bottom of the part started:


Conclusion:
- The Tiertime (Cetus) software is clunky and very limited. Also fucking frustrating, which I recall is one of the reasons I bought the Tinyfab kit. On the upside, they continue to support and update it to some degree, as they are still producing new printer models. Having said that, I'm not seeing any significant improvement in terms of the parameters you can access and control, such as the wall thickness, acceleration etc. And the nozzle preheat / filament loading controls are shit.
- The Tinyfab kit is also pretty frustrating, although the ability to control settings via Fusion 360 may be its redemption. I may need to look more closely at that.
- Loading g code to the Tinyfab via the micro SD card is another PITA, as the slot is difficult to access and you can lose the card inside the display housing if you don't stick it into the socket correctly. There is an ESP32 (wifi) unit on the CPU board, so it should be possible to load wirelessly. I forget if I managed to suss that out.
- Tinyfab don't seem to have followed up since I acquired their kit 4-5 years ago. The support forum is almost nonexistent and the technical documentation is rudimentary to say the least. That's not encouraging.
- The machine envelope is actually pretty tiny, at 180 x 180 x 180mm. That's fine for small components but for anything else, it's a bit of a toy.


No comments:
Post a Comment