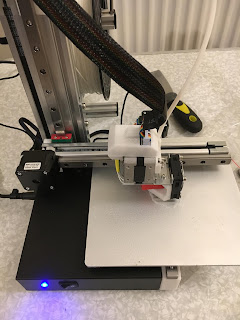
When I posted the pros and cons of the Cetus, I didn't have access to the photos I'd taken. Now I do.
Can't stand "unboxing", although I suppose that's what the first part is.
The Jiffy bag contains the bonus extra set of 3 nozzles and the middle package is the bonus 2 x 500g reels of PLA filament:
Inside the main package are the std contents including the instructions (in something like 8 languages):
Under the top layer of packing is the main vertical columns (the Z axis slide):
Removing the separating layer exposes the base and the table mount (X axis):
Here it is, all pitched out onto the table:
First, assemble the column (3 screws) and the build plate (3 screws), then attached the preassembled hot end (head) unit (2 hex socket bolts). Plug the cables in, fit the filament guide and Bob's pretty much your aunty:
Off we go, printing out one of the test pieces from the library in the iPhone app:
Although there are no instructions or illustrations, this seems to be how the filament spool holder goes together. It's free standing.
Getting there slowly....
Bugger me, this is slow. Admittedly I chose a fairly complex test piece and went for a fine layer thickness (0.2mm).
Left it running overnight and then went to work. When I came back in the evening it was finished. TFFT!
The slicer begins with a raft for the part, extending out a fair way - for stability I suppose.
It's full of support structures....
Used the simple model generator in the PC app to make this,using faster, coarser (coarsest in facT0 settings. This took about 30 minutes:
Note again the foundation layer and the base layer. They both peel off but together they amount to a fair bit of filament.
Figuring out which parts to remove and which to leave was a challenge, not least as I wasn't sure what the finished part should look like. Looks as if this unfortunate being has contracted some form of giant smallpox - largepox perhaps? Don't know who she's been hanging out with but I can't see that ending well. Either way she needs to get down the clinic pronto. But the printed part looks pretty reasonable.
I don't have a macro function on my iPhone but you can see the finish isn't bad at all. I must do a more scientific test piece so I can check the dimensional accuracy.
Retrofitting 1983 Shizuoka AN-SB CNC milling machine, Bridgeport mill, Colchester Bantam lathe and 1982 Tree UP-1000 CNC lathe with modern controls - and other workshop stuff
Subscribe to:
Post Comments (Atom)
LinuxCNC hell - can Gemini AI help?
Oh no, not AI again? Oh yes. Although ChatGPT got a whole load of exposure and caused a whole load of excitement last year, AI is a bit more...

-
Setting up the servo tuning(?) software: Having spent a couple of hours yesterday pratting about with the PID controllers for the X and Z ax...
-
Right, so having gone through the motions with the X axis (cross slide), I should now be able to set up the Z axis (longitudinal) encoder an...
-
The bearing arrived as expected this morning. Took a few minutes to make up a 42 x 25.5 x 7mm thrust washer, then fitted the bearing and was...


No comments:
Post a Comment