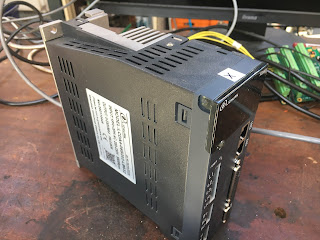
I've got 2 of these, bought for the Bantam lathe conversion. These are the "A4" model and mine are rated at 600W. The manual can be downloaded here.
Now that I have them disconnected again, let's have a closer look. Apart from a couple of screws, the casing simply snaps in place. Equally, it unsnaps easily enough. So it might be rude not to take a closer look.
Off we go:
Here's what it looks like from the outside:
Pretty much the standard appearance you'd expect from a servo drive. On the left from the top - separate AC inputs to power and control circuits, braking resistor connection (loop through to use the built-in one) and (at the bottom) the motor phase connections. On the right from the top - RS422/485 connection(s) via RJ45 connectors, then the signals IO and finally the motor encoder.
At the back, a built-in braking resistor and the cooling air tunnel (fan at bottom, exit at top)
Here's the fan cover. I replaced the "Angry Bee" brand Chinesium fan that came with them for better quality (quieter) PAPST numbers.
Let's dive in:
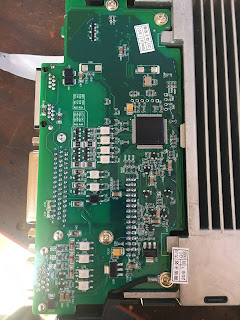
The front cover unclips, revealing 2 PCBAs. One is the high voltage power board and the other is the IO / digital controller board.
This is the IO and digital controller board. That's a Lattice FPGA under its conformal coating. On the other side is a similar QFP package which is almost certainly a 32 bit microcontroller. Couldn't be arsed to remove the board to look more closely and find out what sort it is.
Here's the bottom of the power board. The IGBTs are all housed in a flat package. Pretty sure it also includes the braking resistor IGBT. The input rectumfrier is a 3 phase jobby obvs but it's a std looking square package with a sneaky, extra (5th) pin.
I didn't take it any further apart.
And there you have it. I like to take stuff apart, to see what I am dealing with.
Conclusion:
Doesn't look too bad. It's certainly not up there with the Yaskawa Sigma drives but it's way ahead of the DMM Tech servo drives I have on my Bridgeport conversion. Although the software is pretty basic and the fans require ear protection, the physical implementation isn't as bad as I'd feared.


No comments:
Post a Comment