Now that the enclosure is back in place, I have to fasten it in place and reconnect all the control wiring, hoses etc.
Off to a great start, trying to fasten some cable saddles - these shitty pop rivets yield in the gun, not at the rivet. I was able to recover the situation by fatiguing the pin with pliers but I must get myself some proper rivets. This was the first of many instances...

These are the home and limit switch wires that need to be properly terminated. They aren't long enough to reach the Acorn, so a local terminal block is needed behind the headstock.


Getting there. It won't be really pretty as I'm not going to plaster loads of trunking all over the place.
Hose down to the coolant pump. Will need to run a power cable with it at some point.

Mostly done.


The pukey yellow colour is the primer coat that went on before the final blue-grey. I'm guessing the didn't apply (spray) the grey-blue until the cabinet was in place, hence this panel barely saw any, being masked as it was.

The enclosure needs to be held against the plate at the headstock end.

I'll need to bung up this large chasm before letting rip with the coolant. There was a massive glob of some sort of sealant there originally that will need to be replaced.

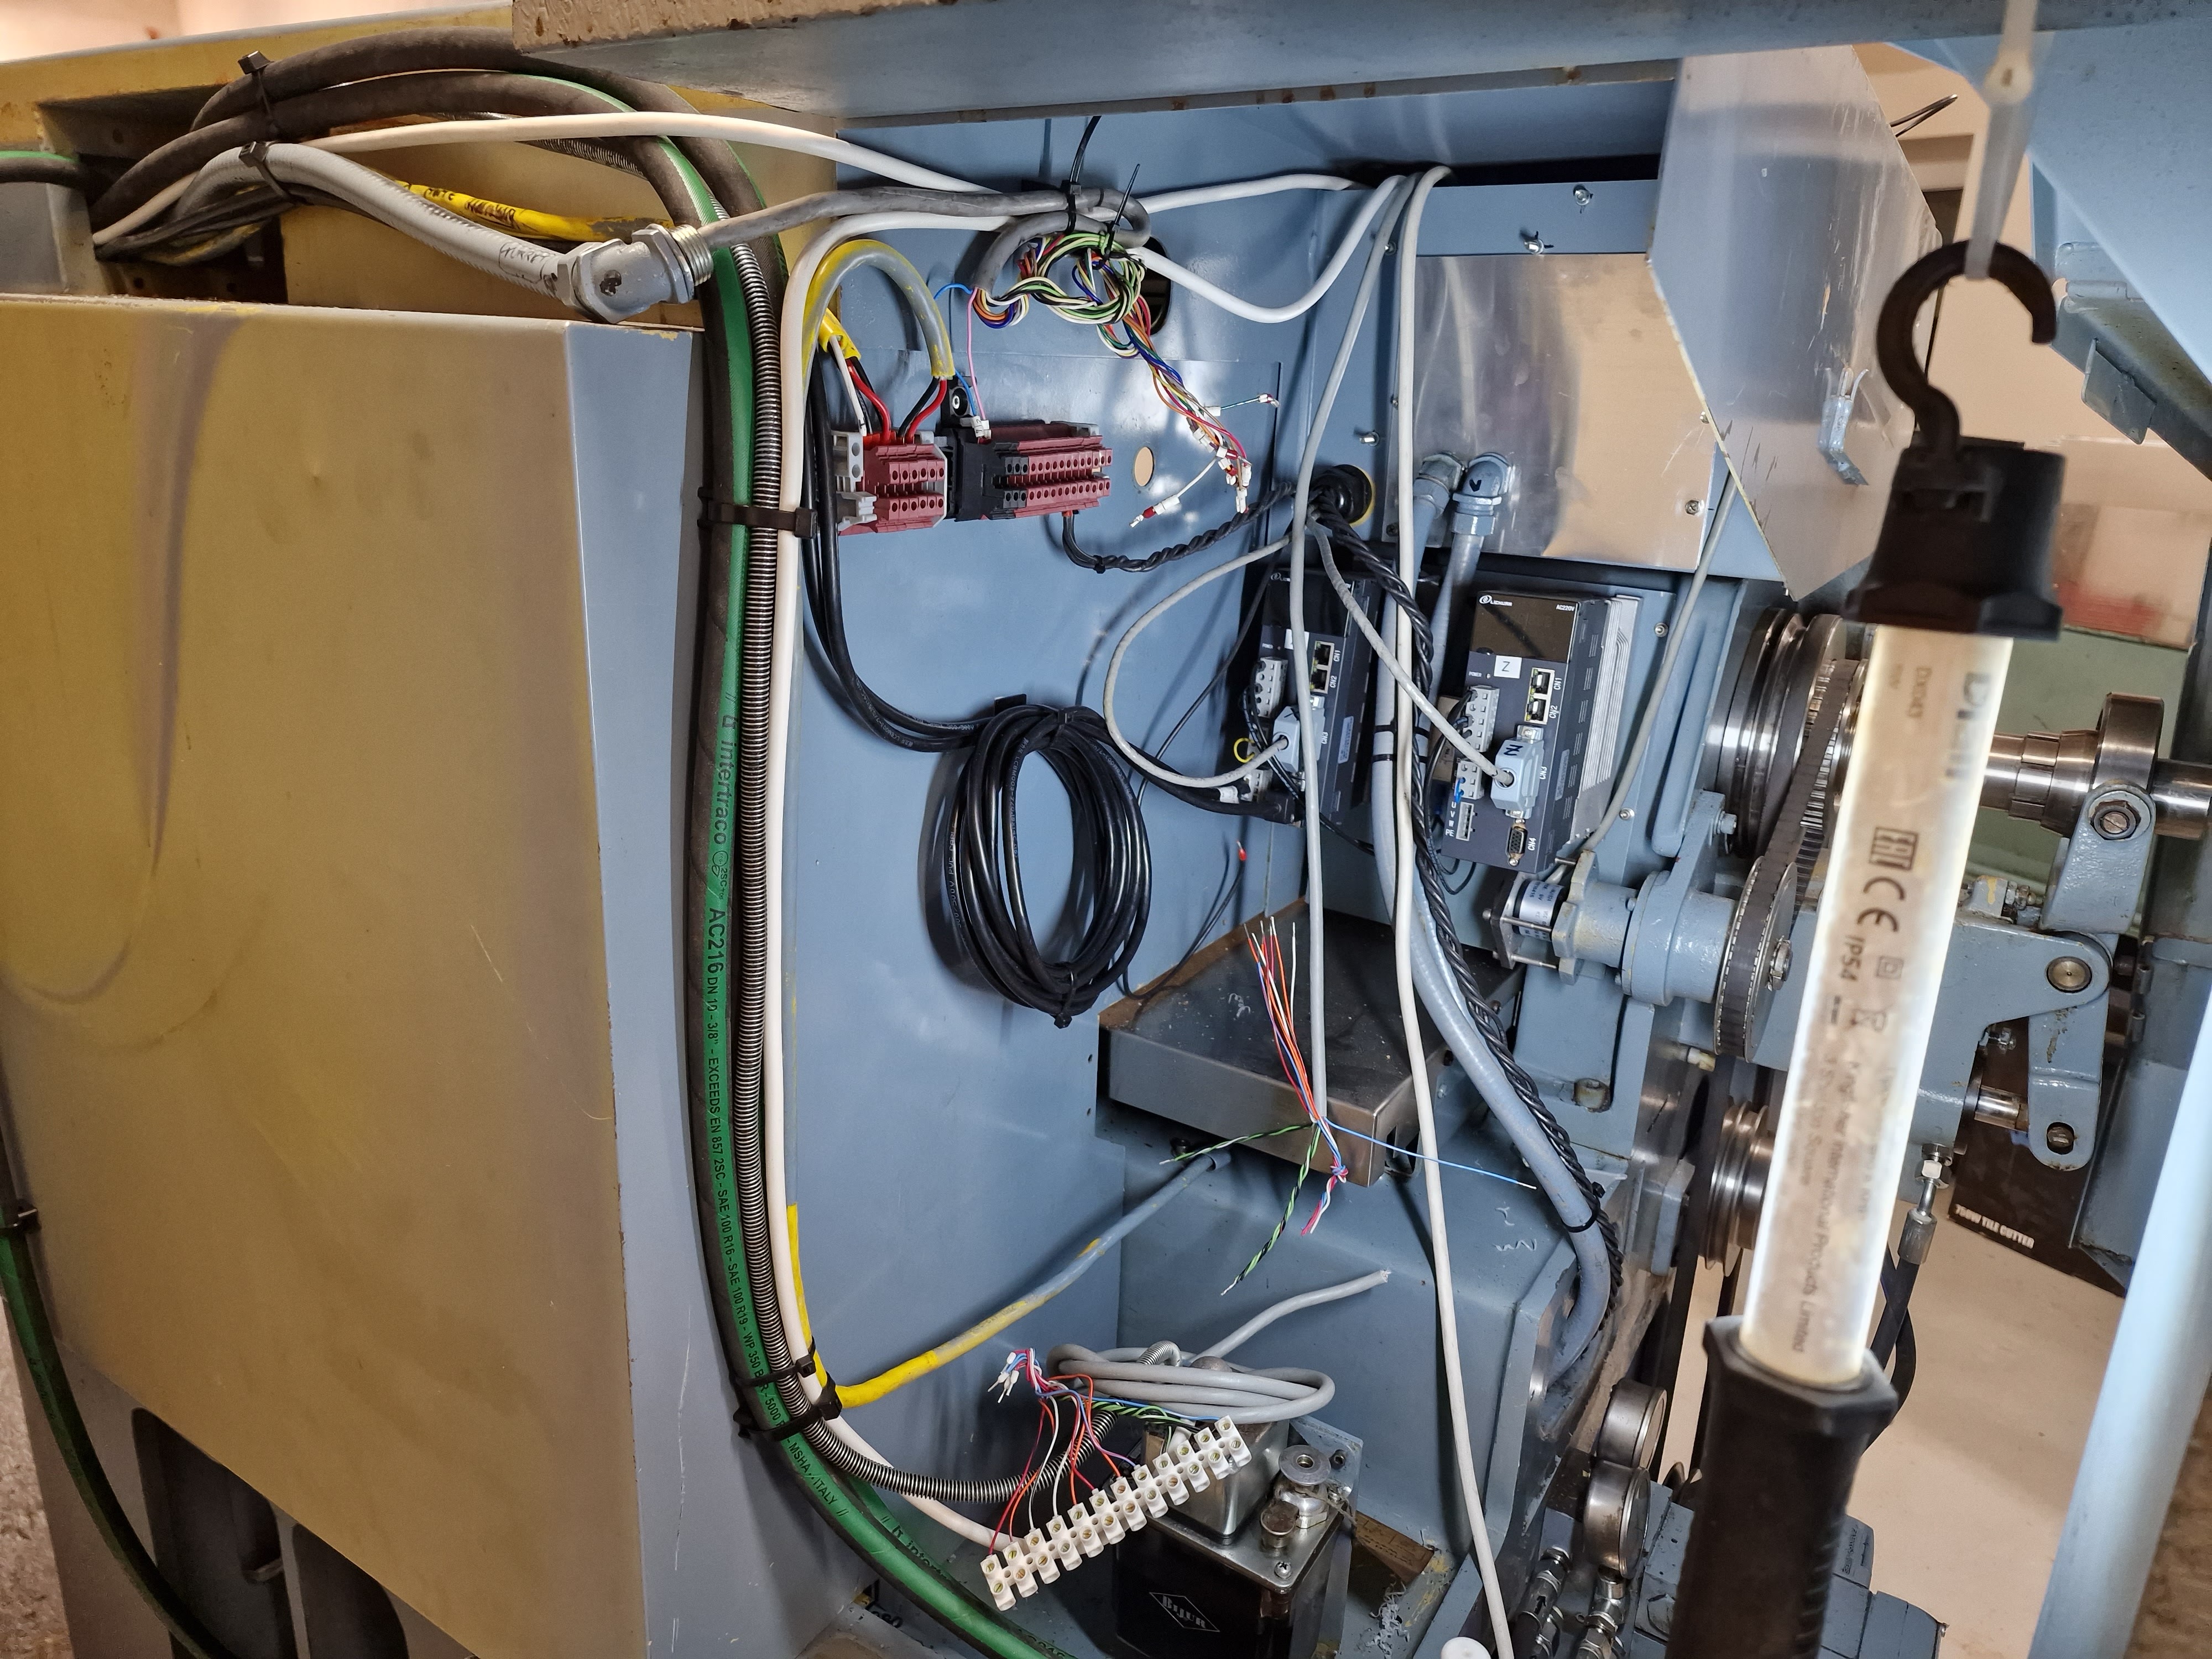
The various mains wiring runs need to be tidied(?) up too. This requires an extra terminal block (bottom right):

Yes, it's a bit of a mess and things are rather tight in there.

Still to do before it will run again:
- Finish connecting up the lights.
- Connect up the 120V transformer.
- Install the monitor and arm.
- Test out the limit, homing, turret etc wiring.
- ...and of course I have the doors and end cover to clean (and possibly polish?).


No comments:
Post a Comment