Sunday, 10 January 2021

Z axis ballnut yoke finalisation and machining

Found a piece of stock that's almost exactly what is required. Again, the CNC gods have  smiled on me. I'll drill and bore out the main opening on the lathe, as it's 44mm diameter. With my recent record of failing to clear swarf from end mills, it's probably best not to do this in The Shiz!

Set it up in the 4-jaw. Note the ground parallels to ensure the stock is square.


Remove the parallels and start drilling


Boring with CCGT06 boring bar


Skim the face to ensure I have a datum surface that's square to the bore


Check it fits the ballnut!!


Time to check the Renishaw probe is still set up accurately. Runout here could lead to offsets etc in the work when I pick up datum features.


Ready to go


2D Adaptive to rough out the externals (3D Adaptive would want to remachine the cavity)


After 2D Contour and 2D Chamfer to finish


Looking good. Just needs flipping and the raft to be faced off - about 8mm thickness


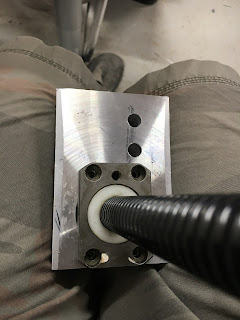
There. Deburred and M5 holes tapped. Done.


I'll need to drill and tap the corresponding holes in the saddle bracket. Having modelled those in the assembly, that should be a simple job.

Let's think about fixing the ballscrew to the bed next....

No comments:

Post a Comment

Arc Captain MIG200!

Yes indeed. Not content with a solitary TIG200PACDC TIG welder , I've gone for the matching pair. ie the MIG200 sister unit. There was ...