Choices:
Given that the supply of general purpose HTD pulleys seem to come almost exclusively from random Chinese factories, I could either order a shit load of randomly sourced pulleys and hope they contain an example that comes close to meeting the approved tooth profile.
The alternative seems to be to have a go at machining one of these boys myself. Being a bit of a gadfly, this naturally appeals to me. Why buy something when you can spend several days buggering about with it yourself?
How to machine your own HTD3 timing pulley?
Obviously I could use a ball end mill but the surface speed at the centre of the cutter is zero and the chances of milling 32 slots of 40mm or so without breakage and with a half decent surface finish seem slim. Then there's also the challenge of finding a suitable 1.8mm diameter ball end mill.
From APT-Tools, I also have a couple of long necked 1.8mm ball end mills. These look admirably fragile but are a fallback ie hopefully they will be a drawer filler (previously the smallest ball end mill I had was 3mm), rather than a primary route.
If I were to mount a boring bar as a single tooth indexable cutter, I could machine the slot from the side (rather than from above), if I could figure out how to select and set up the right toolpath.
I have one of these Korloy mini boring bars. No, I didn't pay £60 - presumably it was on offer at the time, which is when I tend to buy stuff like this from Cutwel...
They would be almost bang on the required radius size (1.82mm technically, from what I can find).
Furthermore, I also have a couple of tiny corner radius end mills with 0.5mm radius. That will allow me to corner off the sharp corners of the resulting slots. Technically, they should be 0.3mm radius but I reckon 0.5mm would be close enough for this application, assuming I have the basic slots made to dimension.
I seem to recall John Saunders posting a Pootube video on this. Sure enough, here it is:
Creating the toolpaths:
Things got interesting about here. No point in repeating myself, so better to link to the post I made on the Fusion manufacturing forum.
Finally, I have a working toolpath for the slot and one for the chamfer operation, each repeated in a circular pattern (32 times) to form the complete pulley.
O05000
(5000)
(32t pulley)
(T2 D=9.4 CR=0.91 - slot mill - 1.8mm round side cutter)
N10 G90 G94 G17
N15 G21
(5555 main slots 2D Contour3)
N20 G28 G91 Z0.
N25 G90
N30 T2 M6
N35 S6000 M3
N40 G54
N45 G0 A0.
N55 G0 X9. Y-18.285
N60 G43 Z2.247 H2
N65 G1 Z-0.924 F333.33
N70 X4. F120.
N75 X-39.
N80 Y-23.285
N85 G0 Z2.247
(5555 main slots 2D Contour3)
N95 G28 G91 Z0.
Off we go:
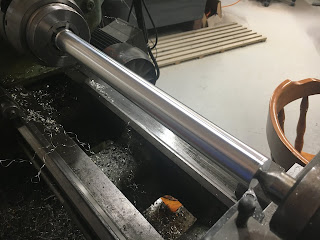
But first, let's turn down some bar stock to the right diameter. I have some 1-1/4" mystery loominum I think I picked up at a steam fair (Old Warden?), so that needs to come down from 31.75mm to 29.8mm or so. Without graduated scales on the lathe, I have to hit the diameter by trial and error, ideally within 0.1mm or so.
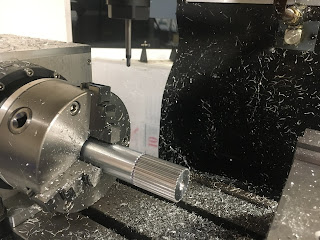
Into the 4th axis, ready for action. I finessed the tool diameter to 9.4mm, having determined by trial and error(!) that the original calculated tool diameter of 8.5mm was a bit on the small side. This shows up when the tool cuts too deep and, ahem, the shouder of the insert joins in the action.
Show me:


No comments:
Post a Comment