Let's carry on from where I left off last weekend.
Z axis drive:
Last time, I removed the end cover from the Z axis ballscrew drive. For one thing I need to access the motor so I can figure out whether or not to retain it or replace it with something more modern. It's certainly a DC brushed motor, so would require a DC servo (eg the cncdrive DG4S16035) but I'd like to see a model and manufacturer and ideally be able to find a datasheet for it, as well as assess the state of the brushes etc. All I know is that it had a 100Vdc supply (70Vac before rectification).
Last time, I removed the end cover from the Z axis ballscrew drive. For one thing I need to access the motor so I can figure out whether or not to retain it or replace it with something more modern. It's certainly a DC brushed motor, so would require a DC servo (eg the cncdrive DG4S16035) but I'd like to see a model and manufacturer and ideally be able to find a datasheet for it, as well as assess the state of the brushes etc. All I know is that it had a 100Vdc supply (70Vac before rectification).


The flex drive for the encoder was a bit fiddly to remove but having done so, I can now see the belt drive and the servo motor mounting. The latter is a fairly simple plate with slotted holes for belt tensioning.


Although I managed to remove the mounting bolts, the motor is too big (tight fit) to remove without removing the plate.

Ooof

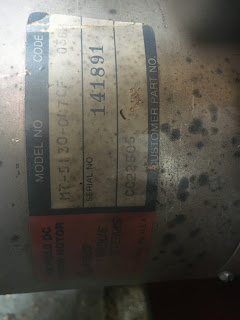
Finally, a motor plate. EG&G are long gone. The model number seems to be MT-5130-047CF. No actual ratings are given anywhere on the motor. Without a datasheet, I'm going to be pissing in the wind with this one.

Here's the space it lives in.

Finally out

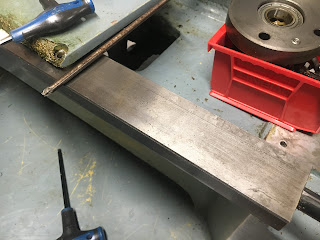
I'm going to need to remove the ballscrew, so let's have a sniff about at the other end. This bellows-type cover set will need to come off.

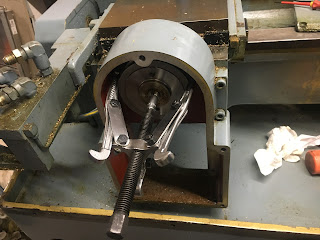
Anyway, time to remove the pulley. Luckily one of the pulley pullers actually fits in the space available.

Luckily it didn't fight me.

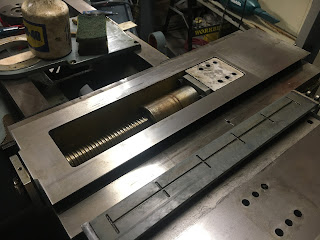
Missing detail - I removed the Z axis (long) ballscrew). The thrust bearing is at the headstock end, simply held down by 6 bolts and 2 dowel pins.
The ballnut is completely gummed up with nasty grease. There's no lube (oil) connection, so it presumably relies on grease for lubrication. Either way, it seems to need some degree of cleanup.


Spindle nose:
Let's have a look under that spindle nose cover and see what we are dealing with.

Underneath the cover, it looks in decent shape. There's some form of taper seat and 12(!) threaded holes. I'll need to figure out WTF sort of interface this is.

Enclosure removal:
I think the time has come to remove the main enclosure. I've removed enough of the cables, hoses, fixings etc to be able to lift it off so I can actually access all the gubbins. Trying to get to it through the holes in the enclosure is a waste of time.
Removing the handful of fixings allows the enclosure to simply slide / lift off.

That nasty yellow colour is the primer paint.


Ready to go

Just needed another pair of hands. Here we go:

That's better - let the dog see the rabbit etc:

Pretty much everything structural you can see here is actually cast iron. No wonder it's so F heavy, although it's lost a LOT of weight over the last couple of days.


Cross slide / X axis:


Quick cleanup before removing the cover and letting all that brass swarf in.

That's better.

Very similar arrangement here. Bloody great cast iron bracket to hold the encoder...

Again, luckily the pulley puller fits in and does the business.
The ballnut is held by 4 cap heads and 2 dowel pins. The pins have a female M5 thread, so I can extract them from above.

Then the cross slide can be moved freely by hand.

The sliding faces are in decent condition. The hand scraping is in good shape, as befits a fully enclosed slide that has had relatively little use.

Even the top face of the ballnut bracket has been scraped in.
The ballscrew is captive until I can remove it from the front thrust bearing. It's actually too long to clear the rear bore and simply lift out.


A closer look at the bed ways. They look pretty good.
Dear god - what have I done!


I'm running out of space with all these enclosures, covers etc.


Right, that's it for the moment. Until next weekend....


No comments:
Post a Comment