Sunday 29 January 2023

Machining the rear of the spindle nose adaptor body - setup

First flip the body round and set it up again in the 4-jaw. As luck would have it, the taper nose I've just machined in the front side of the work piece is marginally longer than the step in the jaws. So when I try to mount the work piece against the faces of the jaw, the taper nose slightly fouls the next step in the jaws - and only just at that. Solution is to put some brass shim stock between the work piece and the jaws.


Sort of getting there. Something's still not quite right. I can dial it in at one position but it's cock eyed elsewhere.


Hmm. Seems that 0.25mm shim stock isn't quite enough to clear all of the jaws. I can get the radial runout where it needs to be - but with a shit load of axial runout. In other words, it's not running parallel with the spindle because it's riding on one of the jaws.


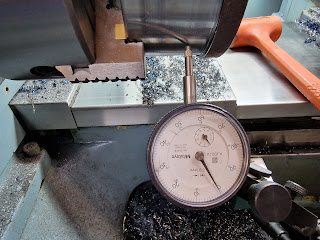
Another lot of 0.25mm shims (total 0.5mm now) just does the trick.


Seems to be about 0.1mm runout in the worst case position. I'm afraid that will have to do. I'm planning to do a final skim cut when the rest of the machining has been done, with the adaptor in position on the spindle, so i can recover some of that.

Well that was a pain in the ass. Apart from the business with the shims, the adjustors and jaws on this Vertex chuck are as stiff as fuck, so getting the final few thousandths isn't quite as simple as it was on the Burnerd chuck I've used previously. I guess you get what you pay for but something better such as a Bison was out of my range. Perhaps they will bed in with time but on this occasion, the whole carry on took me about an hour. I could do without that each time.....

No comments:

Post a Comment

Final assembly and test of the spindle nose adaptor - RESULT!!

After the recent distraction caused by the 3D scanner, resurrecting the 3D printer and buggering about with the throttle bodies for my Honda...