Seemed to be going pretty well, although the first 2D Adaptive roughing pass to clear out the cavity did a couple of naughty moves. This is clearly due to the presence of the 2 countersunk holes in the model. It didn't seem to matter what I did in terms of selecting contours etc - it would still insist on trying to take a large chunk of material at that location. I'd noticed the toolpath looking a bit odd there when I ran the simulation and sure enough, it wasn't very comfortable to watch. Luckily I managed to fumble the iPhone and although I pointed it at the work throughout, it turned out I hadn't started recording. Not for the first or last time....
Luckily the tool survived the condition but I stopped the machine and redefined the roughing as a 3D Adaptive.
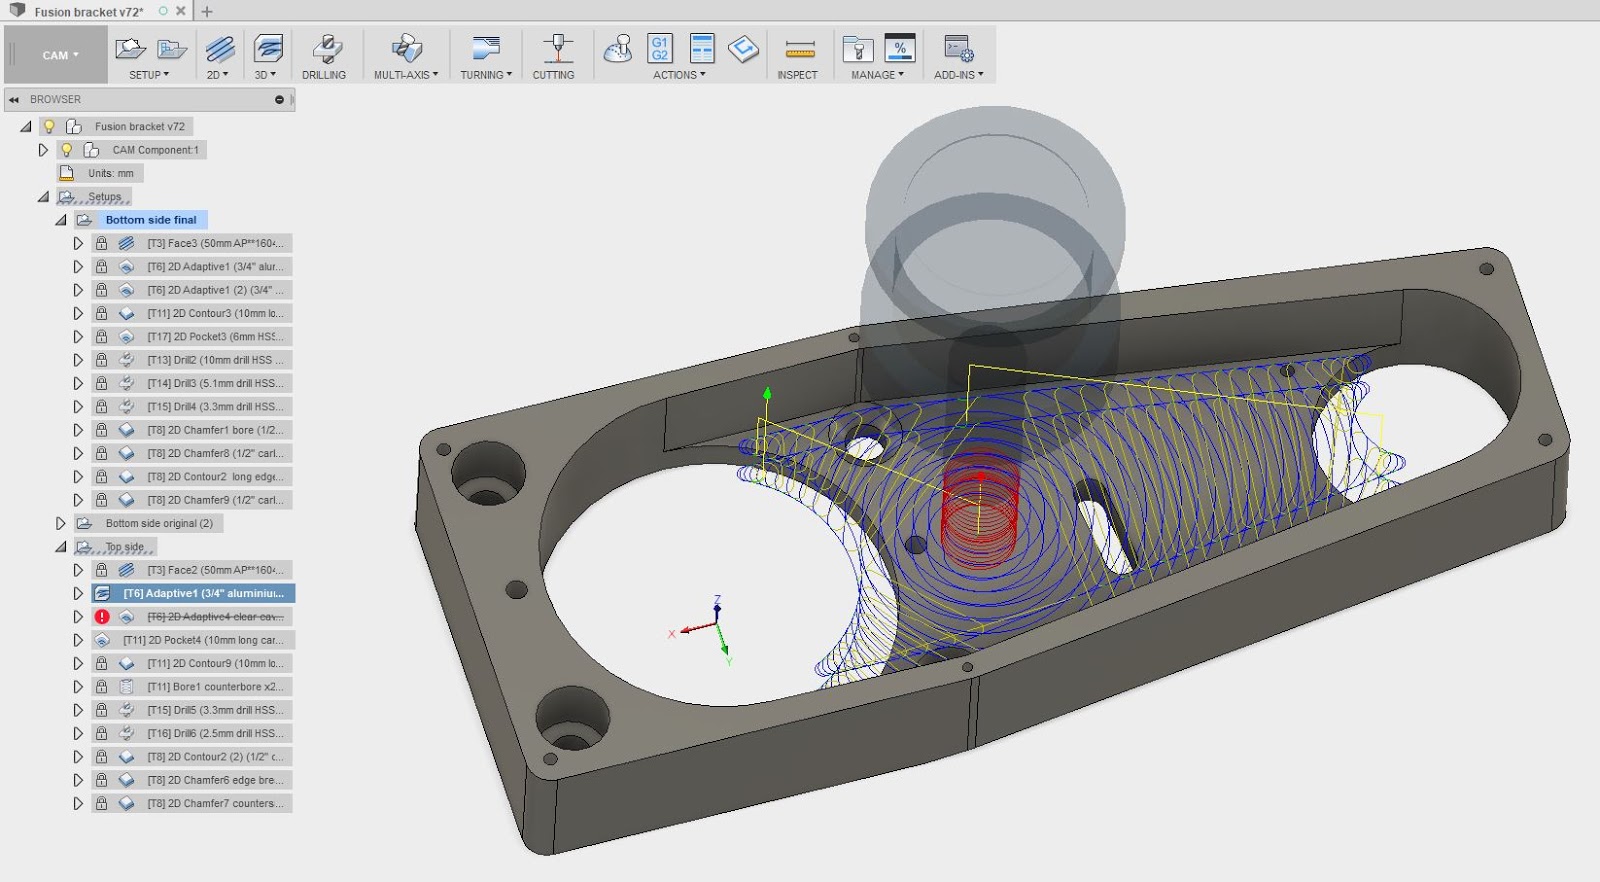
This did the trick, although it now spirals into the centre of the work rather than move in from the large cavity. No problem.
This left a fairly reasonable finish, given that it's a corncob-type roughing tool:

Then finish the cavity with a 2D Pocket to clean up the bottom surface. The tool defaulted to its 5000rpm setting (set in the tool table by me). I've been dialling it down on most operations but it was fine here and left a good finish. Luckily I managed to forget to start recording again but you can see the surface finish is pretty good.
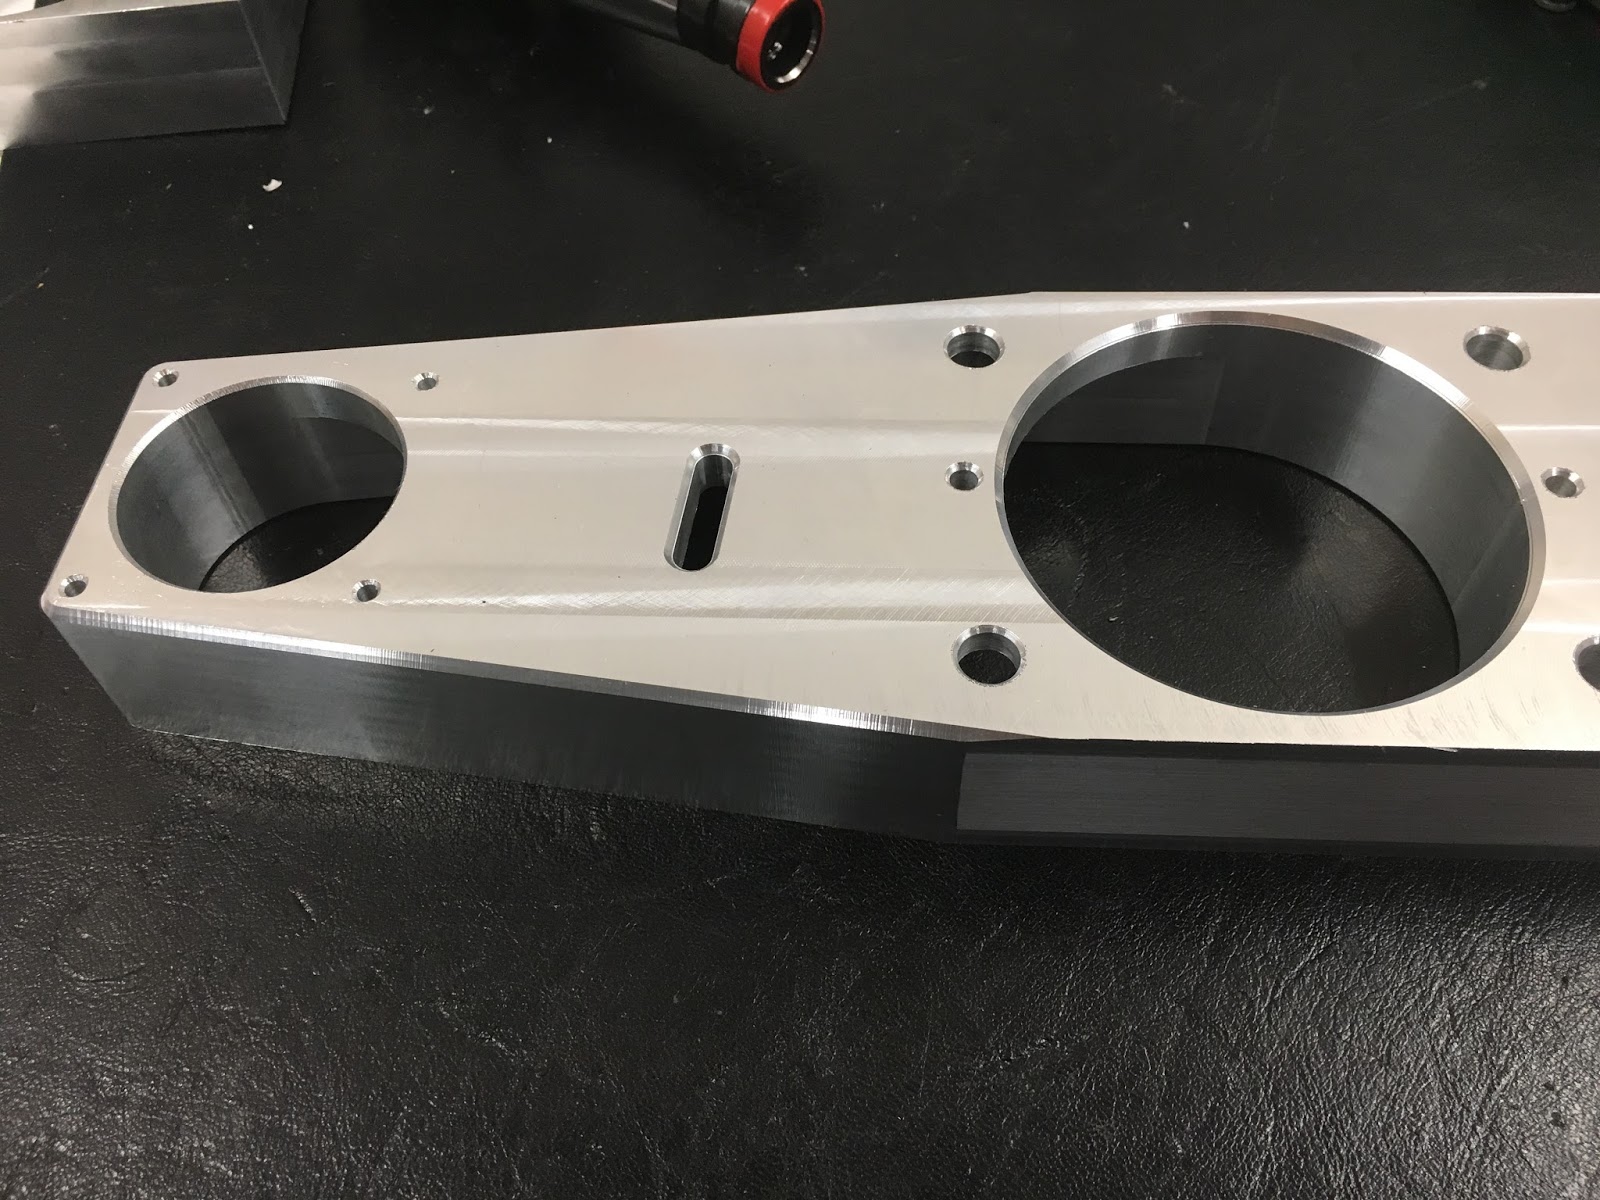
That's the cavity done and it looks pretty decent:


Counterbore the holes:
Drill M4 tapping holes:
Drill M3 tapping holes:
Chamfer / edge break:

Pleased to see that this chamfer worked out ok, given that it is right up against the wall (touching in the CAD model):


Good stuff.
Next:
- Chop off the extra stock and machine the end / fillet the corners.
- Tackle the cover plate. This will require some form of fixture to hold it given that it's long and thin.


No comments:
Post a Comment