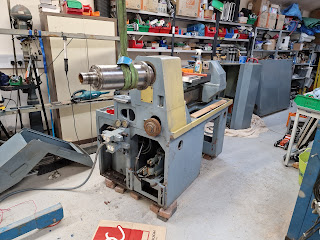
My inability to remove the collet cartridge (assuming that's what we've got here) is really starting to piss me off. Furthermore, when I spin the spindle, it makes a bit of a trundling, rumbling noise. Nothing particularly concerning but on the other hand, if the bearings are fucked, I'd rather know about it and fix it now.
I dismantled and examined the bearings on The Shiz, which was just as well because they'd suffered rust damage, either during its time in storage or when it was sitting under the tarp here while the workshop was being built. Luckily, the bearings were reasonably standard and not ridiculously expensive. With any luck, the bearings on the Tree will also be relatively standard and not stoopid expensive. With even more luck, they will be fine and not require replacement.
So let's just get on with it. The manual claims it's an easily removable cartridge assembly. Presumably that means we remove the flange bolts and "simply" withdraw said cartridge. Removing the front cover reveals the flange and its fiings:
But it's not going to be easy to withdraw while the pulleys are in the way - both the timing pulley (for the spindle encoder) and the V belt pulley (for the spindle drive). So off with both. Remove the 6 screws and lift off the timing pulley:
The drive pulley is held on with a large nut and locked with a set screw.
This reveals the rear cover - and another locknut with set screw. The large external ring is the first to come off. It actually contains a tapered ring that seems to be providing additional radial support for the end of the cartridge.
Aha - that's all we needed to do - out it comes....
It's f heavy, so needs some support. Also, when the cartridge is a very close fit in the headstock bore, it will be a complete bugger to get out the last inch or so - and also to refit it later. There's actually a threaded hole for a lifting eye but I'm pretty sure I don't have one to suit, so a sling will do instead. Luckily the crane has enough room to access the spindle area.
Finally out.
and on the bench. With the locknut and rear cover removed, we can see the rear bearing.
That bearing looks rather dry...
There's a spacer up against the inner race.
NSK - good quality.
NN3015 size bearing
The front retainer ring fixings removed.
Start removing the spindle using a rubber mallet. The orange bead blow hammer isn't really heavy enough.
The rear bearing decided to emerge at this point. Almost no grease evident. It's clear from the marks on the various parts that somebody has been in here before with fists of ham. For some unknown reason, they decided against greasing the bearings, although there's not way to provide oil to them. Perhaps not surprising it makes an audible noise when spun.
It's followed by a spacer ring
Keep going. Note the threaded hole for the lifting eye.
Nearly there, surely.
Finally. 3 bearings with 2 spacers. Note that the sequence is clearly identified by the V shaped marking...
Here's another locknut with set screw.
And a spacer
With the spacer out of the way, the first of the 3 front bearings becomes visible. That's a 7017 bearing. Are the other 3 the same?
Yes
A couple of spacers
There's a grease guard / oil thrower ring just behind the spindle nose.
Done. The spindle is free!
One thing became clear quite soon on in the process. The exploded view of the spindle shows a different assembly to the one in my machine. We already knew that to some extent, as the collet closer is quite different. However, even the bearing arrangement is quite different.
Here's what the manual shows - 2 bearings at the front and 2 at the rear:
Next - clean up the bearings, examine them and (hopefully) grease and reassemble the spindle. Ideally I'd get the collet cartridge off first though........


No comments:
Post a Comment