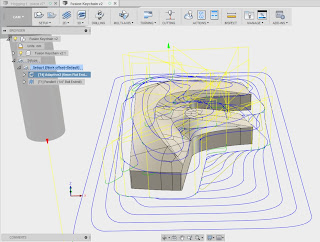
Anyway, I struggled somewhat which perhaps wasn't surprising given all the myriad options and parameters required in the setup screens. I either ended up generating no toolpath at all or something that didn't look at all authorised.
So I just created a very simple 2D part to begin with. This would allow me to do some nice roughing (2D adaptive) followed by a finishing (2D profile).
Roughing:
Finishing:
I have a nice Mitsubishi BAP300 indexable end mill tool (12mm diameter single APMT 1135 insert, 16mm shank) and a selection of coated (for steel) and uncoated (for loominum) inserts. The loominum ones are polished and razor sharp, so should give a good finish as well as cutting the mustard during roughing. Hoho - tools for the job!!
Finally got it all CAMed up and a piece of mystery loominum in the machine vise. Ready to go - what could possibly go wrong? Settings were like this, taken from the Mitsubishi website with additional sums from HSMAdvisor, not least a sanity check that the spindle motor wouldn't be overwhelmed:
- 5000rpm
- 0.15mm/tooth
- 350mm/min
- 4.8mm optimal load (about 40% of the cutter diameter)
- 8mm stepdown (on an 11mm insert)
Well, I thought bollocks - go big or go home. After jacking up the Chinese machine vise, the parallels were just about loose enough to remove, so this I did. Perhaps they should have stayed where they were.....
Sod it. I hit the tit and off it went. Didn't sound too bad. The first (roughing) operation is intended to take 2 passes, as the total height of the feature is 16mm, randomly chosen to present a decent load to the cutter.
The second pass started OK - until the workpiece moved a few mm in the vise. It got pushed down into the vise against the non-existent parallels that I'd just removed. Gah! That increased the load somewhat and once the cutter got a little further round the workpiece, the workpiece rode up a few mm the other way. So I stopped. Nothing broken, just a bit pissed off that it had only got half way through the roughing.
The first pass was actually pretty decent looking for a roughing operation. But after the workpiece was pushed into the vise, the tool shank did some friction machining of the edge of the workpiece.
You can see where the tool ended up further down than had been fully authorised. The other consequence of that was the top of the workpiece rubbing against the shank, generating a nasty growth:
But actually, not a bad result up to that point.
NB: The edges of the second pass are not supposed to be parallel, as it's using a 2D adaptive clearing toolpath. The unauthorised issue resulted in the vertical dimension going to cock.
The Chinese vise has polished and ground jaws, so the coefficient of friction must be in the region of only 0.2 - 0.3 or so. And removing the parallels that would have supported the workpiece probably wasn't the cleverest move. But nobody died and in fact it all went pretty well for a first test. My first ever CNC metal machining.
Luckily I managed to record the beginning and end of the session by turning video off when the machine started and back on afterwards. A senior moment I suppose but at least I didn't screw up the stills....
I'll have another go tomorrow with another piece of loominum - and some parallels. And who knows, I may even succeed in videoing some of it this time.


No comments:
Post a Comment