I'll simply drill and tap the holes on the Blidgeport using the DRO.
For the 3mm slot, I've ordered a couple of tiny 3mm end mills. These are tiny, biddy versions of the 12mm cutter that performed so well on the main operations.
Here's the Cutwel page for the family of EMC85 cutters. And the cutting data.
Set up a toolholder and defined the cutter geometry etc in the tool library:

And the feeds and speeds:

It has a 6mm shaft, so will fit a std end mill holder. And like the bigger version, it has a reduced shank so that it will reach down into a slot - up to 12mm from the shoulder. I need just over 11mm (!!).
Struggled a bit with the CAM, as expected. Wasted a fair bit of time trying to define a piece of stock that would fill in the modelled stock body. In the end, I found that using the 2D Contour path with ONE of the slot edges selected worked fine. And using the heights selection, I was able to limit the bottom height to just below the large bolt hole through the body. So I have one operation from the top...

....and one from the bottom.

The entry and exit paths have to be considered. I didn't want them tracing all sorts of fancy loops and curves on the way in and out.
Notice the distances and radii in the linking tab. They control the flight of the tool around the entry / exit and how far the tool moves beyond the feed distance before moving to the next pass:

...and the "tangential fragment" distance in the "passes" tab. This controls the extension of the toolpath out to the right of the part:
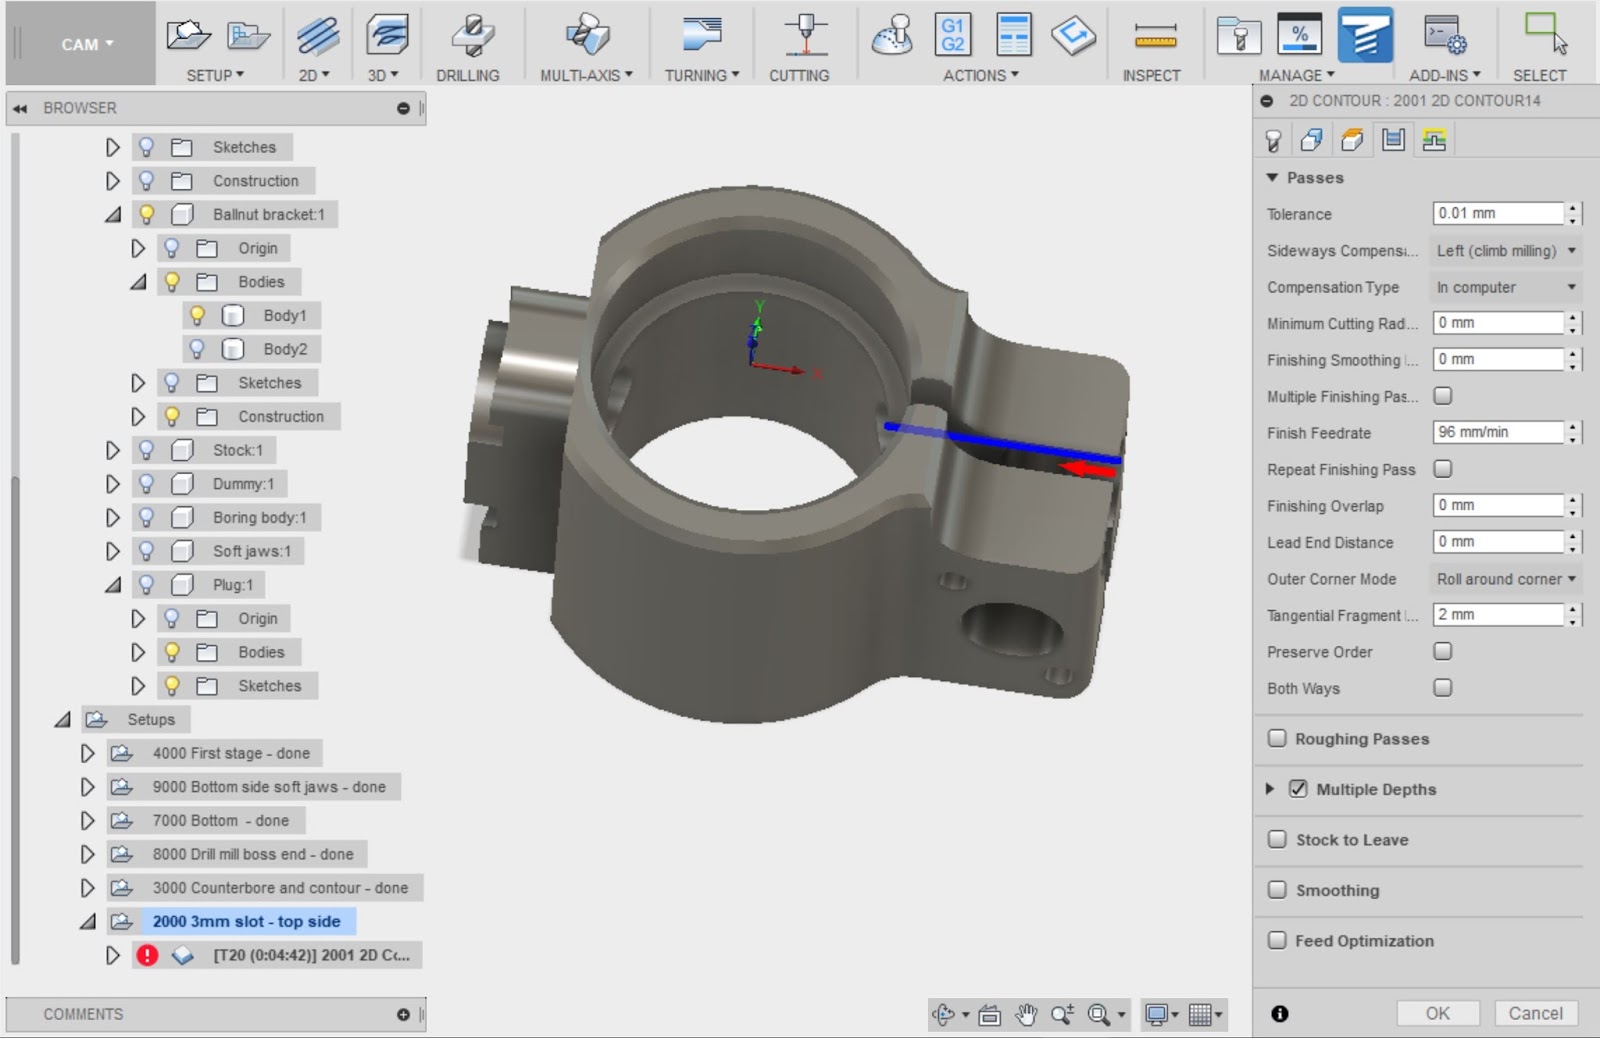
Apart from deciding how brave I feel about the final feeds and speeds I should use, that seem to be all I need to do. Currently I have 2mm roughing stepdowns and 1mm optimal load, plus 0.004mm per tooth. I may dial that back, particularly the stepdown.
Hiatus:
Despite ordering the baby end mills on Wednesday morning, the "First Class" service from The Royal Mail has been a long way short of that. There was a time when First Class would mean next day delivery. It's now Saturday, the postie has been - yet still no end mills. Grrrr.
Drilling and tapping:
Finished drilling through the 10.5mm clearance hole for the pinch bolt and the 3.3mm tapping holes for the four M4 holes (DRO and limit switch bracket). Then machine tapped those five holes for the first 5-10mm to ensure they were straight. Finally, finished the tapping by hand, off the machine. To tidy up, with the DRO homed in, I was able to lightly countersink / edge break the drilled and / or tapped holes.
M10 pinch bolt:

Made a nice job. But there again, I used the nominal tapping drills, so the thread should have been close to 100%:

M4 screws:

Slotting the yoke:
Sod it. I couldn't be arsed to wait for the end mills. Besides, there's a pretty good chance the yoke will spring together when I finally break through completely and the cutter will ping. So instead, I bolted a machine vise to the bandsaw and made 2 cuts.
The moving jaw on these Taiwanese saws just bolts on to the nut:

Low tech stuff - simple but well proven:

Ready to go:

Looking good:

Making the second cut (the slot was "designed" to be 3mm wide):

Funnily enough, there was no spring either way when the saw broke through. Needn't have worried.
It's probably not dead on in terms of alignment but it certainly looks pretty darned close. And for the application it will be fine.
A bit of deburring and tidying up with some diamond files and a diamond plate and - job done!!
You can see a slight cockup in this first photo. I placed one of the holes on the wrong side of the bracket. Managed to realise that before drilling the second matching hole. It'll be hidden by the bracket. Besides, it's good to show that I am human and thus fallible:

This is my "good side":


Alongside its hand made aluminium twin:


There.


No comments:
Post a Comment